
Are Separates Still Worth It? Marantz AV 20 and AMP 20 Make a Case
Understanding Audio Setups: Integrated Amplifiers vs. Separates
When it comes to audio setups, there are really two main approaches: integrated amplifiers and separates. Integrated amps combine the preamp and power amp into one unit, which makes them compact, easy to set up, and simple to use. This is the type of design most people are familiar with in an AV receiver. Separates, on the other hand, split the preamp and power amp into individual components. This gives you more flexibility, such as mixing and matching equipment, adding more channels, and usually means you get a bit more power for your speakers. As you move into higher-end systems, separates also tend to become more common.
Just over a year and a half ago, Marantz released their flagship AV 10, a 15.4-channel processor. Alongside it came the AMP 10, a 16-channel power amplifier rated at 200 watts into 8 ohms. For a lot of people, including many on the forum, that combo quickly became the go-to setup if you wanted something close to reference-level performance without jumping into the very highest end of processors. The problem, though, was what to do if you didn’t actually need that much processing power. Do you spend the extra money and leave channels unused, do you step back to an older AV8805A, or do you settle for the Cinema 30? That’s essentially the gap the new AV 20 and AMP 20 are here to fill.
Features of the AV 20 and AMP 20
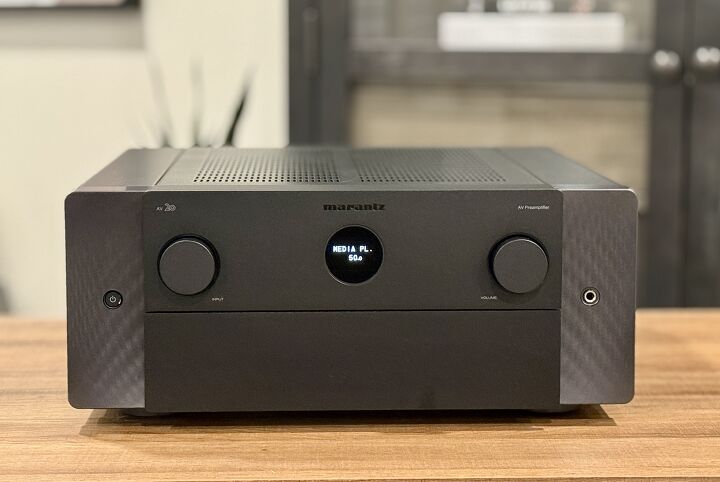
Starting with the AV 20, this is a 13.4 channel preamplifier, which means you get 13 channels of processing plus four independent subwoofer outputs. It supports just about every format you’d expect at this level, including Dolby Atmos, DTS:X, IMAX Enhanced, 360 Reality Audio, and even Auro 3D. Like most Marantz gear, HEOS streaming is built in, along with Bluetooth, and also supports Roon Ready. Room correction includes Audyssey MultEQ XT32 out of the box, but you can also purchase Dirac Live separately. That unlocks Dirac Live Room Correction and, if you want to go further, Dirac Bass Control. Marantz has confirmed that the AV 20 will be the first processor to support Dirac Active Room Treatment (ART) later this year.
Under the hood, it uses the same ESS ES9018K2M DACs as the AV 10, though the HDAM (Hyper Dynamic Amplifier Module) boards are a little different between the two models. Inside, the AV 20 runs on a dual-core Analog Devices SHARC DSP chipset. This processor is paired with dedicated 32-bit, two-channel DACs and a jitter reduction system designed to maintain accurate timing. It’s the same type of architecture Marantz has relied on for its flagship gear, just scaled for this level.
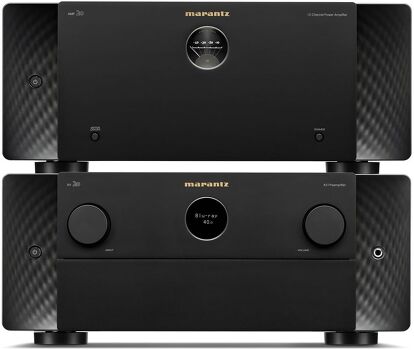
Moving over to the AMP 20, this is a 12-channel Class D amplifier built to deliver power. It uses a toroidal transformer along with Marantz’s HDAM-SA2 modules to maintain clarity and control across all channels. The amplifier is rated at 200 watts per channel into 8 ohms (1 kHz, THD 0.05%) with two channels driven, and it can also deliver 400 watts per channel into 4 ohms. If you need more, you can bridge a pair of channels to push 400 watts into 8 ohms, with up to six channels configured this way. For setups that benefit from bi-amping, the AMP 20 also allows you to reconfigure all 12 channels to bi-amp up to six speakers.
Design and Connectivity
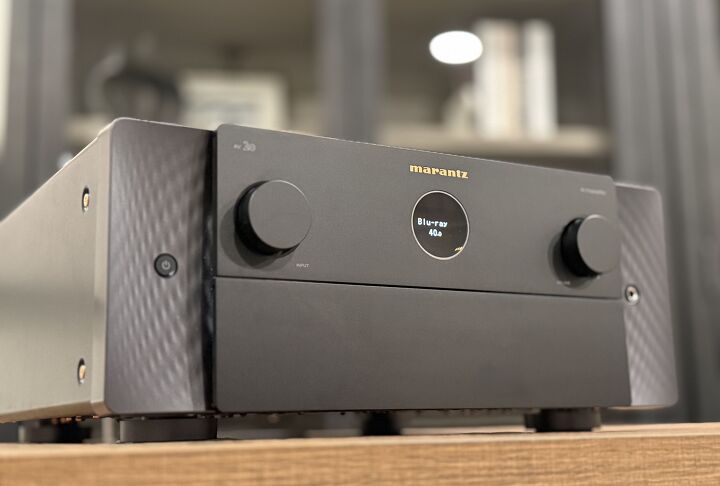
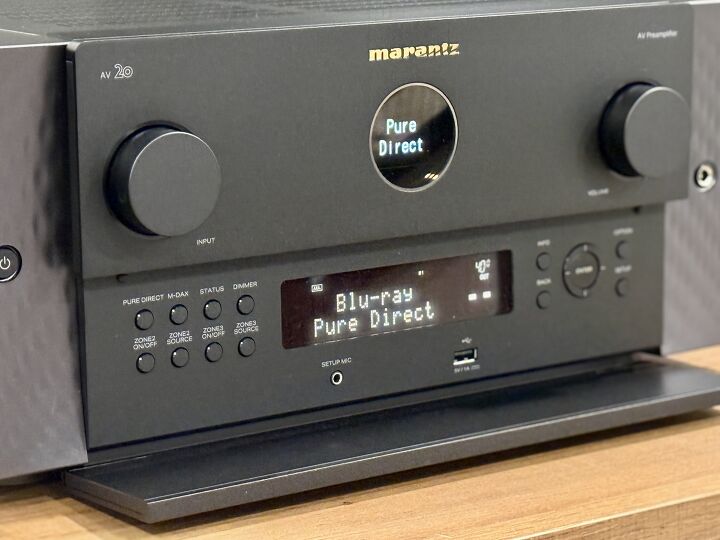
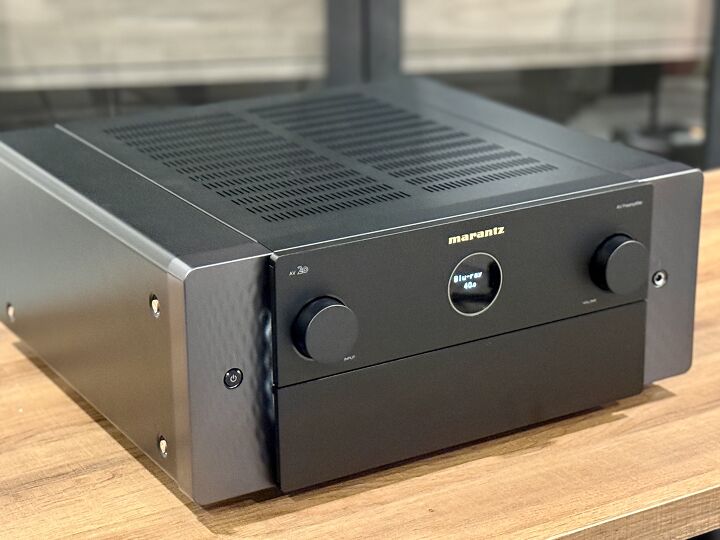
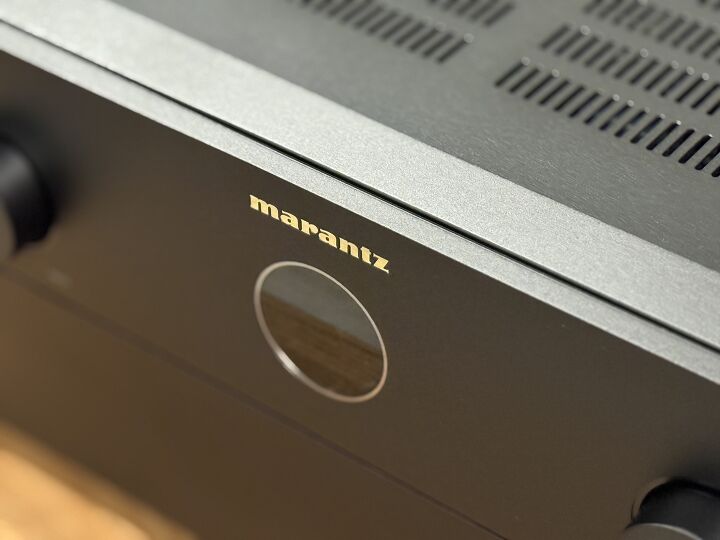
The first thing you notice when unboxing the AV 20 and AMP 20 is the signature Marantz styling. Both units feature the familiar circular “porthole” display on the front, which provides basic information at a glance, while the AV 20 also hides a more detailed display and controls behind a drop-down door. Around the back, the AV 20 is loaded with connectivity options. You get a mix of analog and digital inputs, including a moving-magnet phono stage, two optical and two coaxial digital inputs, and even legacy video options like composite and component for anyone still running older gear.
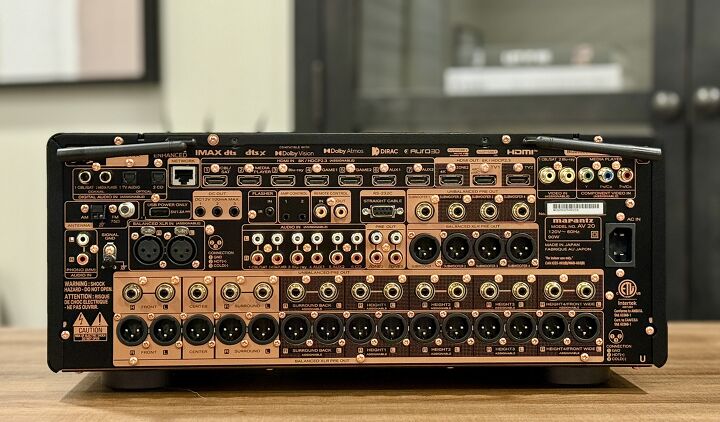
When it comes to HDMI, there are seven inputs capable of 8K/60 or 4K/120 signals, plus three HDMI outputs, two for the main zone and one for a second zone. The main output also doubles as an eARC connection. The whole unit is built on a copper chassis, which Marantz continues to use on its higher-end products for noise control and rigidity. The AV 20 measures 17.4-inches wide x 17.2-inches deep x 7.5-inches inches tall and weighs around 33lbs.
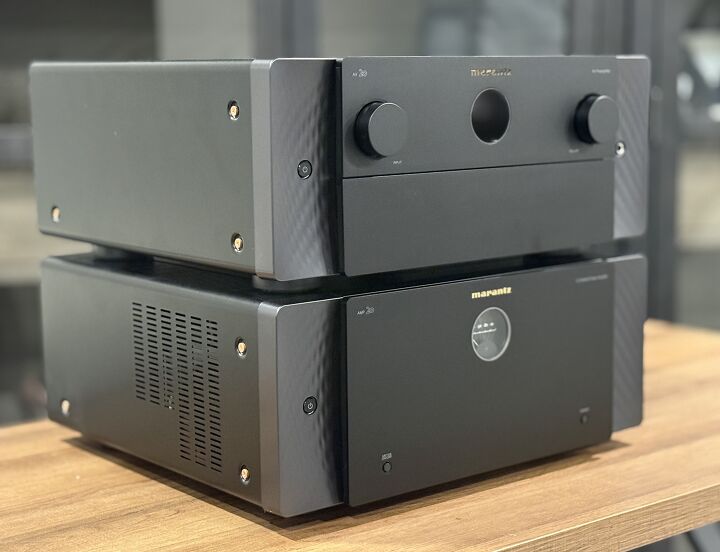
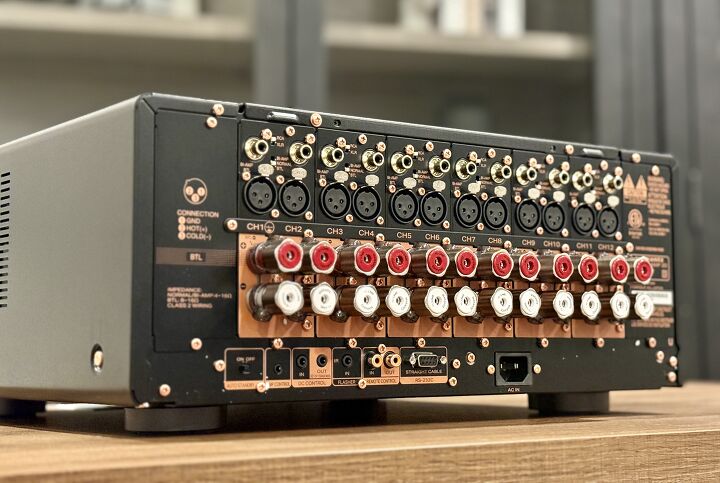
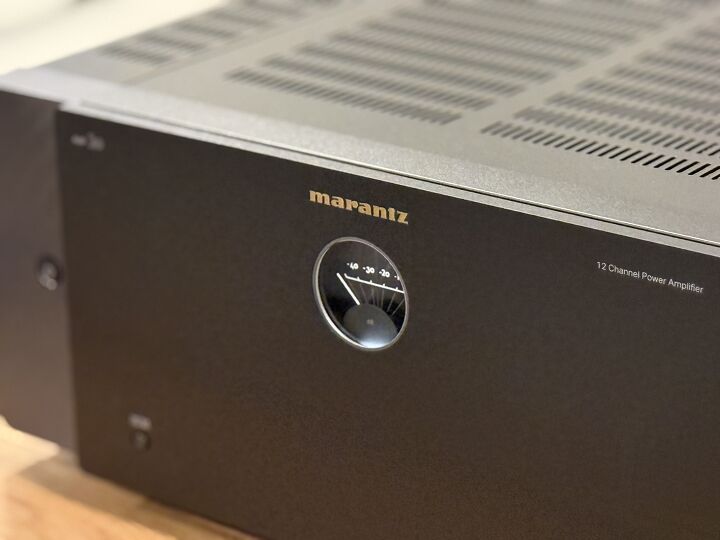
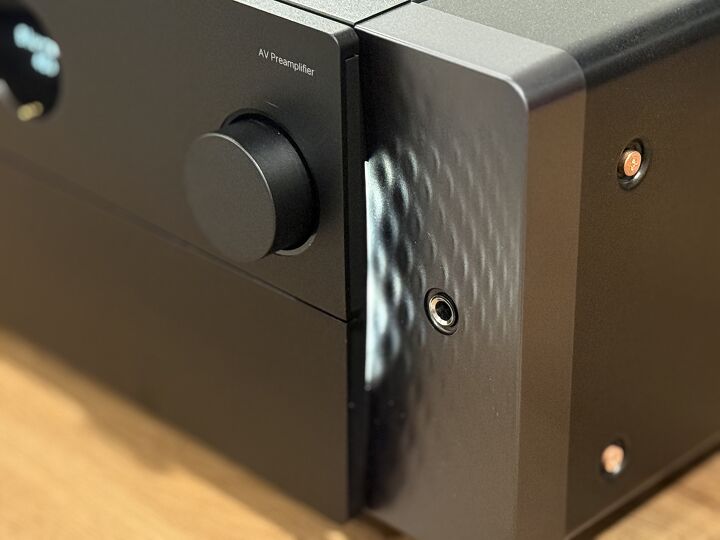
Both the AV 20 and AMP 20 are available in either black or silver finishes, with textured side panels that can be backlit, dimmed, or shut off completely depending on your preference. The AMP 20 takes a slightly different approach on the front, swapping the circular OLED for a softly illuminated level meter. The design is subtle and gives nods to the level meters on Marantz’s vintage tube amps from the late 1960s. Around the back, the AMP 20 is laid out with rows of twelve speaker terminals, each solidly built and spaced to handle thicker cables. Alongside these are twelve inputs for both balanced XLR and unbalanced RCA connections, giving you the flexibility to configure the system in different ways depending on your setup.
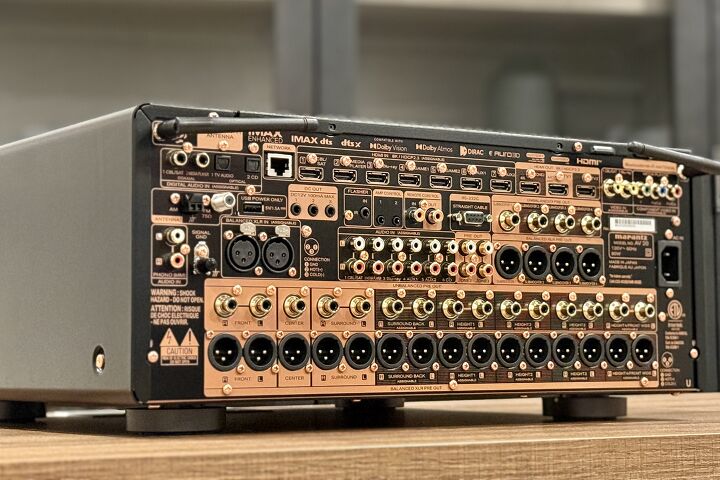
Marantz also includes several control and trigger ports, along with an auto shut-off option. The binding posts feel rock solid and even come with a dedicated tightening tool, which isn’t something you often see included. The AMP 20 measures 17.4-inches wide x 17.4-inches deep x 7.5-inches tall and weighs about 40 pounds, though if you’re using balanced cables, you’ll want to account for the extra depth they add.

Remote and Setup Experience
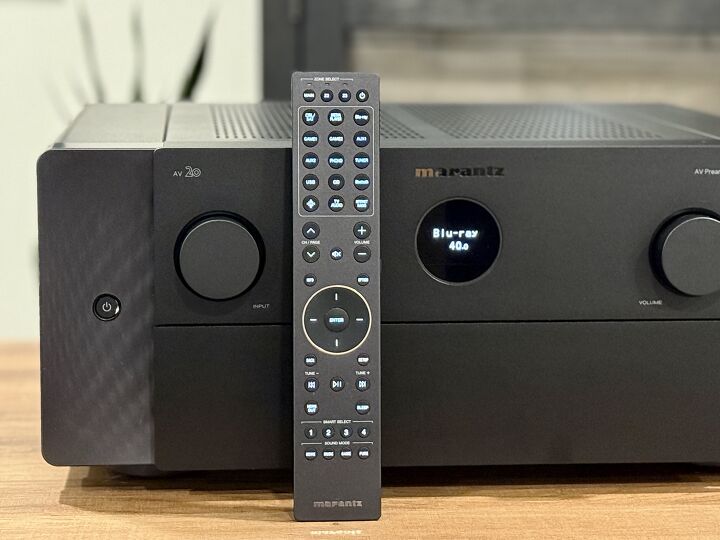
The remote that comes with the AV 20 is just as nice as the unit itself. It isn’t oversized or cluttered, and the buttons have a solid feel with enough travel that you don’t mistake one for another. A backlight is built in, which makes a big difference in a dark room, though it isn’t motion-sensing. Instead, there’s a small button on the side to activate it, and after a few uses, it feels second nature. Inputs sit at the top, volume and navigation controls are centered where your thumb naturally rests, and below that are playback and quick-select buttons for faster access to commonly used settings. The four sound mode keys are grouped at the bottom, which keeps them out of the way until you actually need them. Overall, the remote feels solid and what you would expect from something of this caliber of equipment.
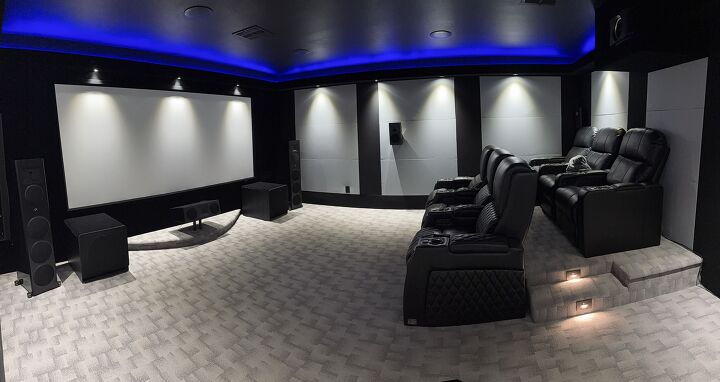
I tested the AV 20 and AMP 20 in a 7.4.4 setup. The main front speakers were Martin Logan Motion XT F200 towers paired with the Motion XT C100 center. Surrounds and rears came from the Motion MP10, with four Motion MC8 in-ceiling speakers handling Atmos. Low-end duties were handled by four Klipsch RP1400 subs. Sources included a Kaleidescape Strato V, an R_volution PlayerPro 8K, and an Apple TV.
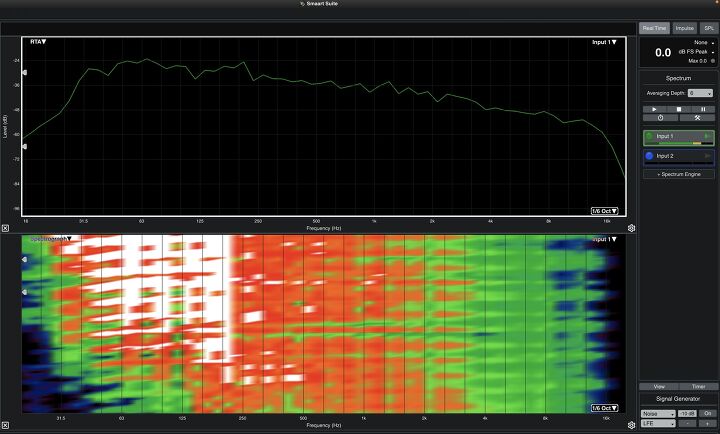
Once everything was wired up, I decided to give ART a try since it recently became available for the unit. I had a chance to experience it earlier this year with the StormAudio Fusion in my setup, so I was curious to see how it would compare between the two. From what I understand, the main difference lies in how many filters each processor can apply for Dirac ART, with the AV 20 capable of around 96 filters. For those who don’t plan on investing in Dirac Live, the AV 20 still includes Audyssey as a built-in option at no extra cost. Audyssey can be run through the MultEQ Editor app on iOS or Android for an additional fee, while PC users can use the MultEQ-X software, which is free to install but requires a $199 license per AVR. Personally, I’ve never been a huge fan of Audyssey, but I ran it alongside Dirac Live anyway just to compare results.
Another key point is that ART is specifically designed to address low frequencies, operating only up to 150Hz. This is where most room-related issues, like lingering bass and resonance, occur, so ART focuses entirely on cleaning up this part of the frequency range. One other thing to keep in mind is that you want to have as discrete control over subwoofers as possible as ART works better with more control points.
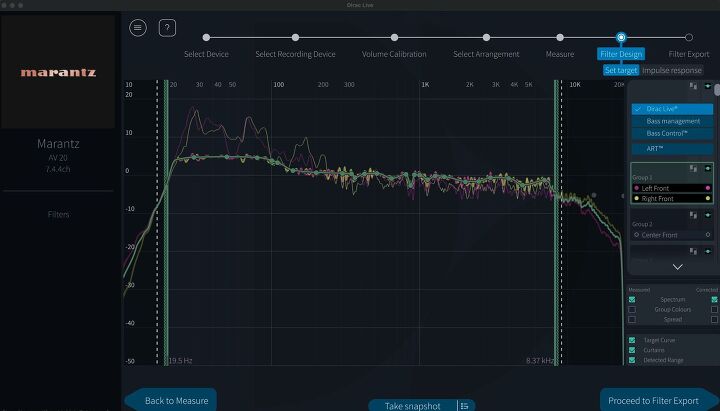
The AV 20 supports Dirac Live if you purchase a license. Limited Bandwidth runs $259 and handles corrections from 20 Hz to 500 Hz. Full Bandwidth costs $349 and extends correction up to 20 kHz. There’s also Dirac Live Bass Control for $299, which lets you integrate multiple subwoofers more precisely. One thing to note is that the included mic doesn’t work with Dirac, so I used a miniDSP UMIK-1.
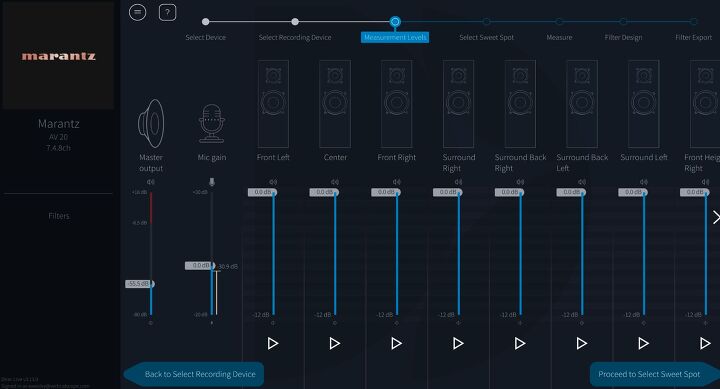
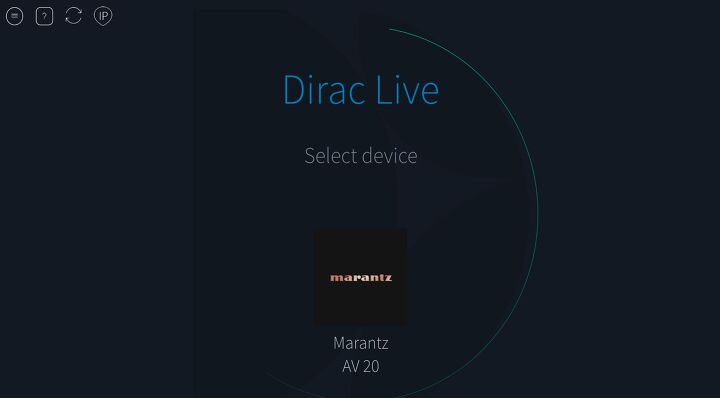
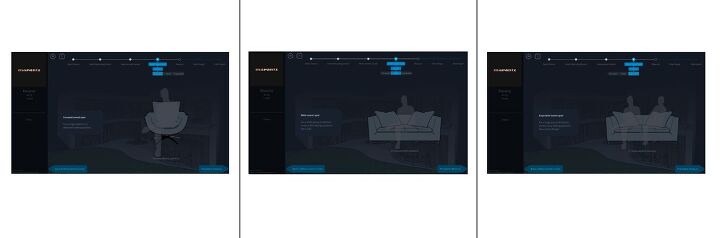
If you’ve used Dirac before, the process here will feel familiar. After buying a license, you download the software, and it automatically finds the AV 20 on your network. From there, you pick your mic, run level calibration, and select a measurement pattern. From there, you’re presented with three measurement options: tightly focused (designed for one person in a chair, requiring nine positions), focused imaging (for one person on a couch, requiring 13 positions), and wide imaging (for two people on a couch, requiring 17 positions).
What’s interesting is that these selections don’t change the calibration results in any meaningful way. They just offer different graphical representations of the microphone placements and adjust the default number of measurement positions. For instance, if you select “wide” but take only nine measurements, the results will be identical to the “tightly focused” option. The reasoning behind this is that as you add more measurement positions, you dilute the accuracy, which is why the “tight” option is preferred for precision.
The first measurement is critical since it sets the acoustic center. If you use different seats for movies, music, or casual listening, you don’t have to redo everything. You can save a preset, change the first mic position, and load it when needed.
It’s also critical to make sure that your measurements are precise. If you take nine measurements and four are inaccurate, ART will flag the issue with a red exclamation point, and the calibration won’t work properly. For best results, aim for a slightly wider microphone placement to gather the most accurate data. In audio calibration, everything is a tradeoff, and while simplicity might save time, it often comes at the expense of performance.
Once you run the measurements, Dirac applies up to 8dB of correction by default, which can sometimes be too aggressive. To prevent overcorrection, we manually adjust the target curve by creating intentional dips where needed. The goal is to keep the distance between the target curve and the average response as small as possible, typically a maximum of 4dB. In the Dirac Live program, you’ll see different calibration options in the upper right. Clicking on ART will take you to the main setup screen. On the right side, you’ll find ART groups, which are predefined based on the information gathered from your processor or receiver.
This is where things can get tricky. It’s absolutely critical to ensure that speakers grouped together share similar bandwidth characteristics. While Dirac does a good job of organizing the speaker groups, if a speaker needs to be reassigned, or you desire it to be in its own group for the ART Support design, simply drag it into the correct group or to empty space to create a new group. Once the groups are arranged properly, you can begin tuning the parameters.
Although ART actively adjusts frequencies only up to 150Hz, its impact extends well beyond that. Depending on the system capabilities and setup, you can see measurable improvements up to three octaves above its active range. The more speakers and subwoofers in the system, the more pronounced the effect becomes.
Dirac Live ART is fully flexible. If my left front speaker has a slight null at one frequency while my right front has a different issue at 380Hz, I don’t have to compromise one to fix the other. Instead, I can split them into separate ART groups and create independent correction target curves for each. I did have to pull my right front into its own group to give it its own target curve. This is why understanding your speakers’ frequency range is essential.
For my speakers, I set a lower support range of 65Hz for the front left and right speakers, front center at 70Hz telling ART to allow the left and right speakers to support each other by 5dB at that frequency up to 150Hz. The subwoofers were set so that their upper support range matches the lower support range for each speaker group. The surrounds were set at 96Hz, while the ceiling speakers were set at 99Hz. For ART, we allowed the four base-layer surrounds to contribute to the correction for the front left channel from 96Hz to 150Hz at a level of 5dB.
When balancing the EQ for the LCR and surround channels, the idea is to make the surrounds stand out slightly without overwhelming the mix. For my LCR, I applied a 1.2dB boost at 140Hz, kept 1kHz flat, and was at -0.5dB at 2.5kHz. On the surround channels, I bumped 140Hz up to 2.4dB, set 1kHz at 0.7dB, and crossed the zero threshold at 2.5kHz. These small adjustments allow the surround effects to pop just enough to be noticed, without drawing too much attention or overpowering the main mix by increasing their overall level.
For the ART design, I organized my speakers into 5 groups: fronts, center, surrounds, rear surrounds, and tops. For the top surrounds, the speakers support each other by -12dB, with side surrounds providing -9dB of additional support. The same principle applies in reverse, with side surrounds supporting each other by -12dB and the tops providing -9dB of support. While my bed layer speakers play up to 96Hz, the top surrounds stop at 99Hz. I also added some additional support from the sides to the front.
Once you've finished, hit the Calculate button, and Dirac Live will process the results. This step takes longer than a standard Dirac Live Room Calibration, which makes sense given the amount of data being processed. Once it's done, you can export the filter and head back to the Marantz UI to load the calibration.
Performance and Listening Experience
I’ve spent a good amount of time with Marantz gear over the years, so I was curious to see how the AV 20 and AMP 20 would hold up in both music and cinema playback. Marantz has a reputation for delivering warmth without sacrificing detail, but with Dirac support now added to the mix, I wanted to hear how it shaped their sound. To start, I went with some two-channel listening before diving into movie demos.
I started out with Dire Straits’ Brothers in Arms, and right from the opening of Money for Nothing the presentation was expansive. The guitar riff had grit while the percussion was locked tightly in the soundstage. Around the 3-minute mark, when the mix fills out, the system manages to stay controlled with Dirac engaged, giving the low end a little extra boost. To push the system further, I switched to Daft Punk’s Giorgio by Moroder. This track is a challenge as it layers spoken word, synths, bass, and live drums in a way that can easily turn muddy. The Marantz combo never lost its grip, separating each layer cleanly. The bass line hit hard without overwhelming the mids, and the gradual build of the song retained its energy.
Testing all three Dirac modes—Room Correction, Bass Control, and ART—highlighted just how transformative ART can be. The difference between the three was striking. Room Correction sounded good and immersive on its own. Stepping up to Bass Control, the bass became tighter and more defined. But ART took it to another level entirely. The track was more precise, with a sense of spaciousness that’s hard to describe. I’ve heard this track on other systems before and if it’s a system that’s not set up properly, it just becomes a boomy mess. Not here, though. Each layer of sound was distinct, and the system handled the shifts in dynamics effortlessly.
Active Room Treatment works similarly to passive room treatment but operates dynamically. Instead of only addressing a single harmonic problem, ART affects the entire room harmonics, similar to what you might see with the Allison step effect (a phenomenon that occurs when a loudspeaker interacts with a reflective surface, such as a wall or floor and cancels out certain frequencies). Even though ART’s active range is limited to frequencies below 150Hz, its impact extends beyond that range. You can see how Dirac ART influences the room’s response up to three octaves above its active range. The more speakers and subs you have in the system, the more pronounced this effect becomes. It’s like smoothing out the sonic wrinkles of the room in real-time, and you can definitely hear the difference.
Dune: Part Two is one of my favorite demo movies, so I had to start here. The atmosphere was tremendous when the Reverend Mother's spacecraft arrived to test Paul. Once the spacecraft touches down, chanting voices begin to pour out of what appears to be every speaker in my room. The Ornithopters always engage my top layer of speakers as the blades swiftly vibrate and bring out detail that’s not there on many other processors.
Next up was The Dark Knight Rises, specifically the football stadium explosion scene. Even though it’s a bit on the older side when it comes to movies, it’s a great torture test for dynamics, starting with the delicate sound of the boy singing before the chaos unfolds. The AV 20 did a great job capturing the tension in the silence, then delivered the explosion from the subs. The collapsing concrete moved seamlessly across the room, almost creating a dome of sound that put me right in the middle of it. Even as the mix grew with explosions around the city, dialogue from John Blake stayed clear and easy to follow.
I know I bring up this scene a lot in my reviews, but that’s because it has become one of my go-to tests for channel separation. The Matera sequence in No Time To Die has a way of exposing weaknesses in lesser processors, and I’ve found it consistently separates (pun intended) the great from the average. Just like with the more expensive processors I’ve tested over the past year, the AV 20 and AMP 20 kept the soundstage intact, with the bells tracking perfectly as the camera pans through the town square.
You can follow the sound as it travels from the front top heights to the rear heights, then into the surrounds, and back again, without a single break in the transition. The bells themselves did not introduce any harshness or distortion, even at reference levels. Since my left and right speakers are 4 ohms and extend down to 30Hz in my room, I experimented with running them full range to see if the AMP 20 had the muscle to handle it. I’m happy to say it never once ran out of steam or lost composure, even during the most demanding tests.
Final Thoughts
At $6,000 each, the AV 20 and AMP 20 are by no means inexpensive. But compared to the flagship AV 10 and AMP 10, they come in at a more approachable price point while still delivering performance that firmly belongs in the high-end category. This pair strikes a balance between cost and capability that makes sense for anyone who wants reference-level processing and power without stepping all the way up to a processor that costs two to three times the price.
The sound quality is where this combo excels. The AV 20 and AMP 20 create a presentation that feels expansive yet detailed in a way that pulls you right into the content. The AV 20’s Dirac and Audyssey options give you flexibility in tailoring the sound to your room, while the AMP 20 delivers the headroom needed to keep everything composed even during demanding scenes. Yes, Dirac is still an extra cost, and at this price point, I don’t think Audyssey alone is going to cut it. But if you’re already spending this kind of money, a few hundred dollars more for Dirac is worth it.

Posting Komentar untuk "Are Separates Still Worth It? Marantz AV 20 and AMP 20 Make a Case"
Posting Komentar