
How to Set Up TikTok Ads Pixel: A Complete Step-by-Step Guide
TikTok has become one of the most powerful platforms for digital marketing, with over 1.6 billion users and a massive adult audience. For businesses looking to maximize their reach and drive conversions, TikTok Ads Pixel is an essential tool. This small piece of code helps track user actions on your website, allowing you to measure ad effectiveness, optimize campaigns, and build custom audiences. In this guide, we’ll walk you through the entire process of setting up a TikTok Ads Pixel, from creation to verification.
What is a TikTok Pixel?
A TikTok Pixel is a tracking code that you place on your website to monitor user interactions. It captures data such as page views, form submissions, and purchases, which can then be used to improve your ad campaigns. The Pixel works by sending information back to TikTok whenever a user performs an action on your site, enabling you to:
- Attribute conversions to specific ads
- Optimize ad performance
- Build custom audiences
- Create lookalike audiences
This makes it a crucial tool for any marketer looking to refine their strategy and boost ROI.
Understanding Events
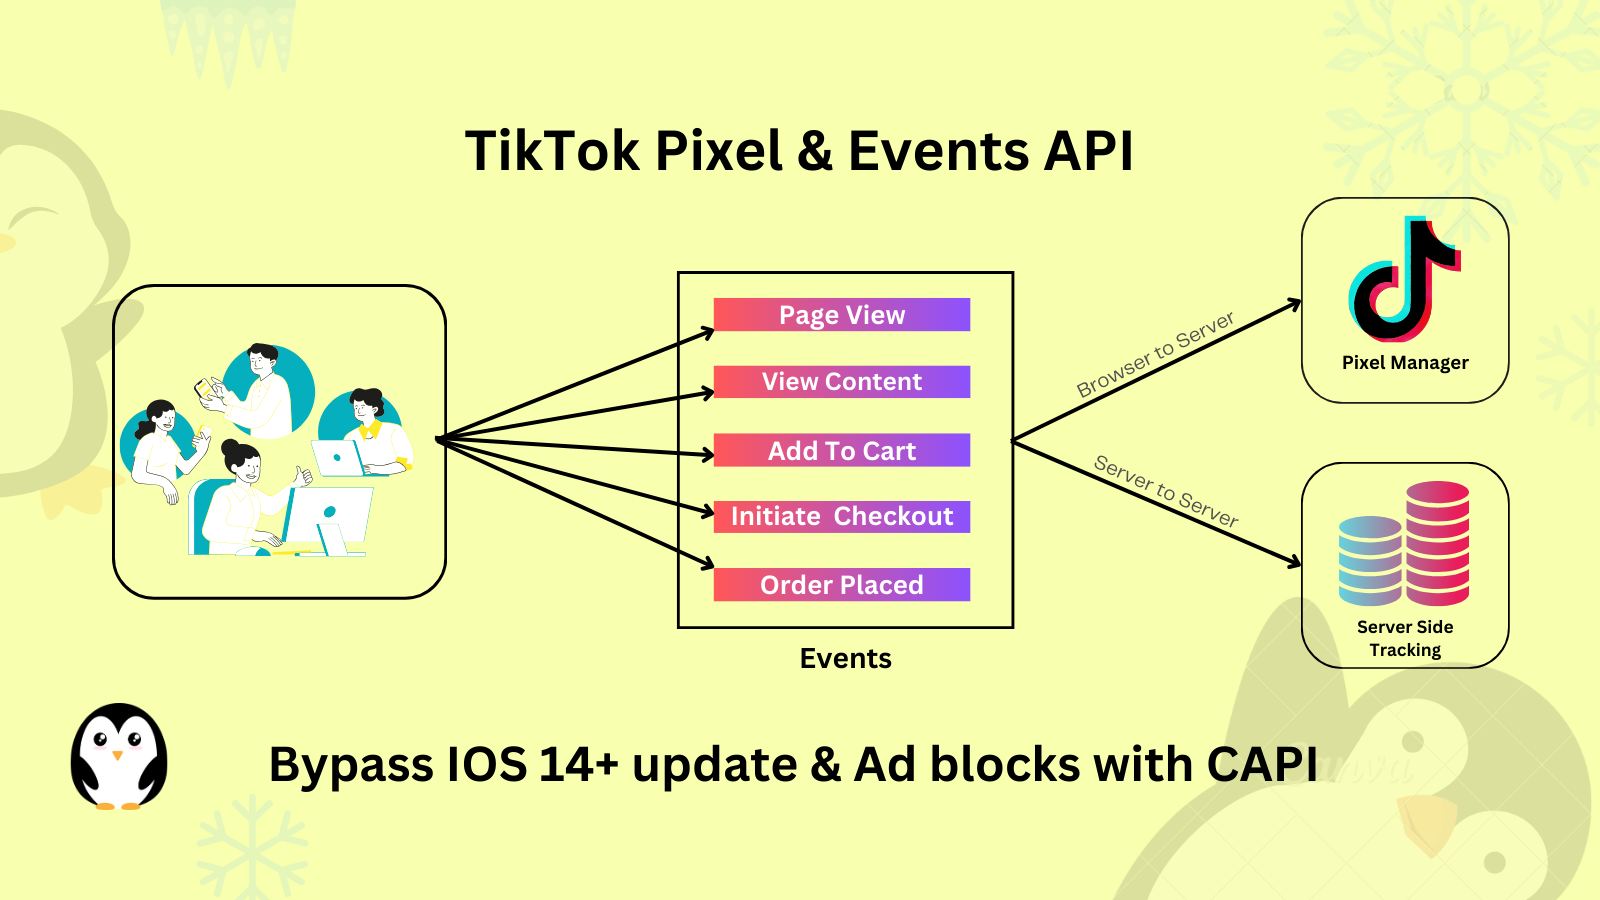
Events are specific actions taken by users on your website, such as clicking a button, adding an item to a cart, or completing a purchase. TikTok Pixel supports two types of events:
- Standard Events: These are predefined actions like "Add to Cart" or "Complete Registration." They cover most common tracking needs.
- Custom Events: These allow you to track unique actions not covered by standard events, such as starting a free trial.
Choosing the right events ensures that you capture the most relevant data for your campaigns.
Benefits of Using a TikTok Pixel

Implementing a TikTok Pixel offers several advantages:
1. Conversion Tracking
Track how many users complete desired actions after seeing your ads. This helps in calculating ROI and understanding which campaigns are most effective.
2. Audience Building
Create custom audiences based on user behavior, allowing for more targeted advertising. Lookalike audiences can also help you find new customers similar to your existing ones.
3. Ad Performance Optimization
Use data from the Pixel to fine-tune your ad strategies, ensuring you're reaching the right people at the right time.
4. Retargeting
Set up retargeting ads to reach users who have interacted with your site but didn't convert. This can significantly increase your chances of converting potential customers.
How to Create a TikTok Pixel
Setting up a TikTok Pixel is straightforward. Follow these steps:
Step 1: Log in to TikTok Ads Manager
Navigate to the TikTok Ads Manager and select Tools → Events.
Step 2: Choose Web as the Pixel Type
Select Web if you want to track engagement on your website. Click Next.
Step 3: Enter Your Website URL
Type in your website URL and click Next.
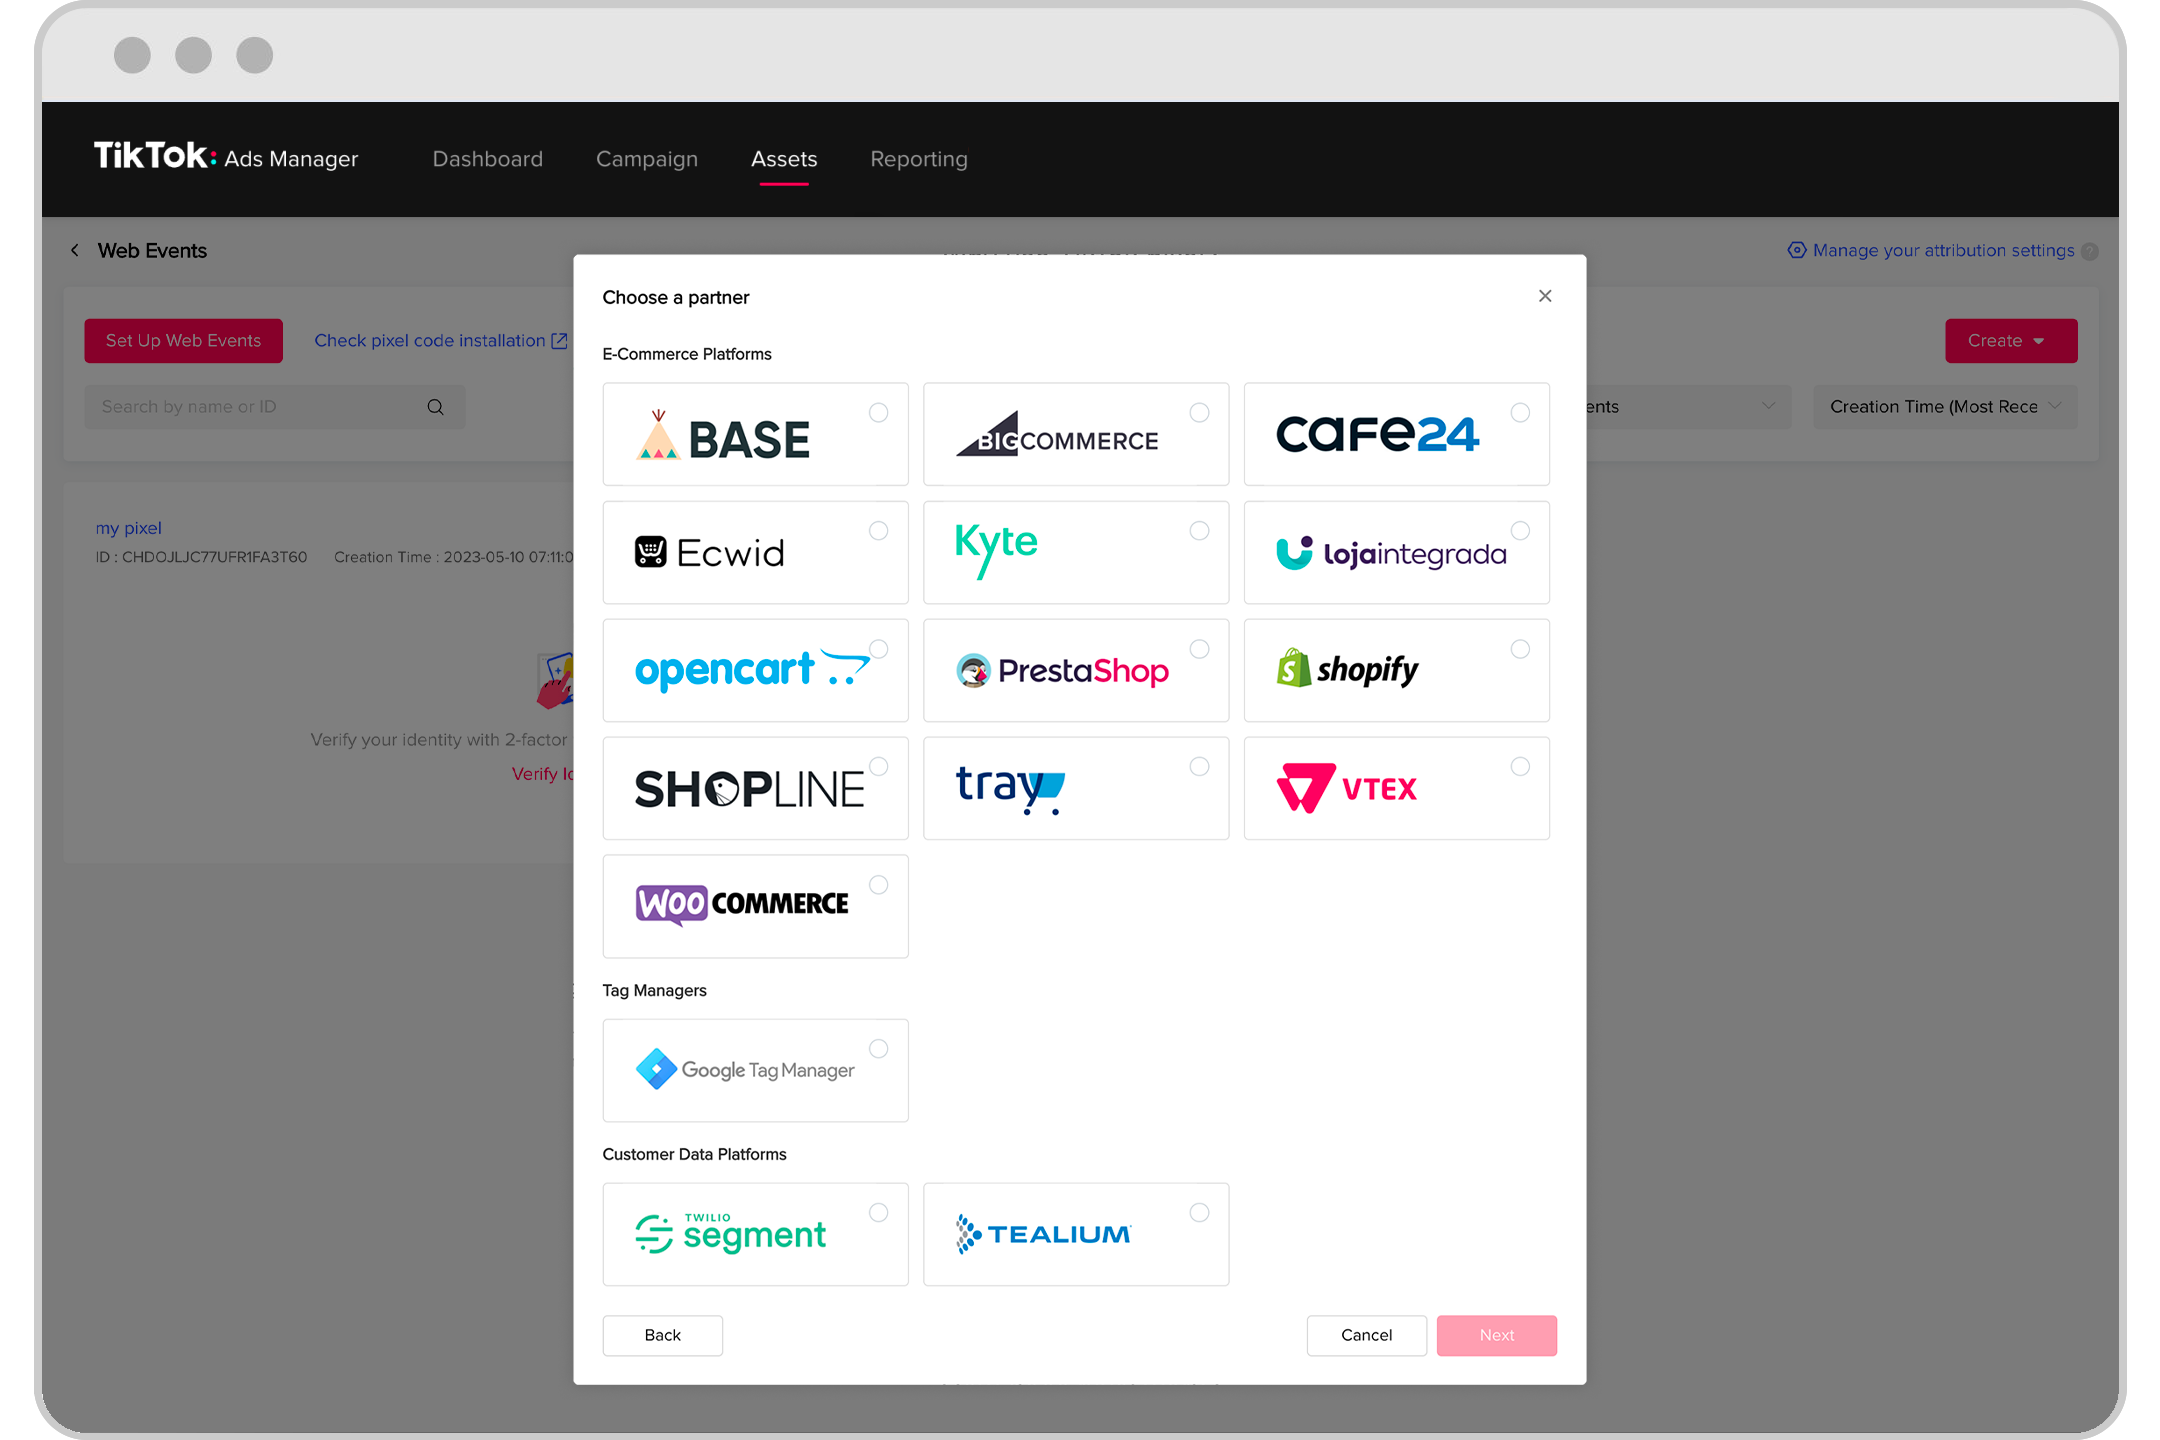
Step 4: Choose Installation Method
You can either install the Pixel manually (copy and paste) or use a partner integration like Shopify, WooCommerce, or Google Tag Manager.
Step 5: Select Pixel Options
Choose between TikTok Pixel + Events API for better tracking or just TikTok Pixel if you prefer a simpler setup.
Step 6: Name Your Pixel
Give your Pixel a clear name and click Create.
How to Add TikTok Pixel to a Website

Once you’ve created your Pixel, you need to install it on your website. Here’s how:
Step 1: Copy the Base Code
From the TikTok Ads Manager, copy the Pixel code.
Step 2: Paste the Code
Access your website builder (e.g., WordPress, Wix, or Shopify) and paste the code between the <head> and </head> tags on every page.
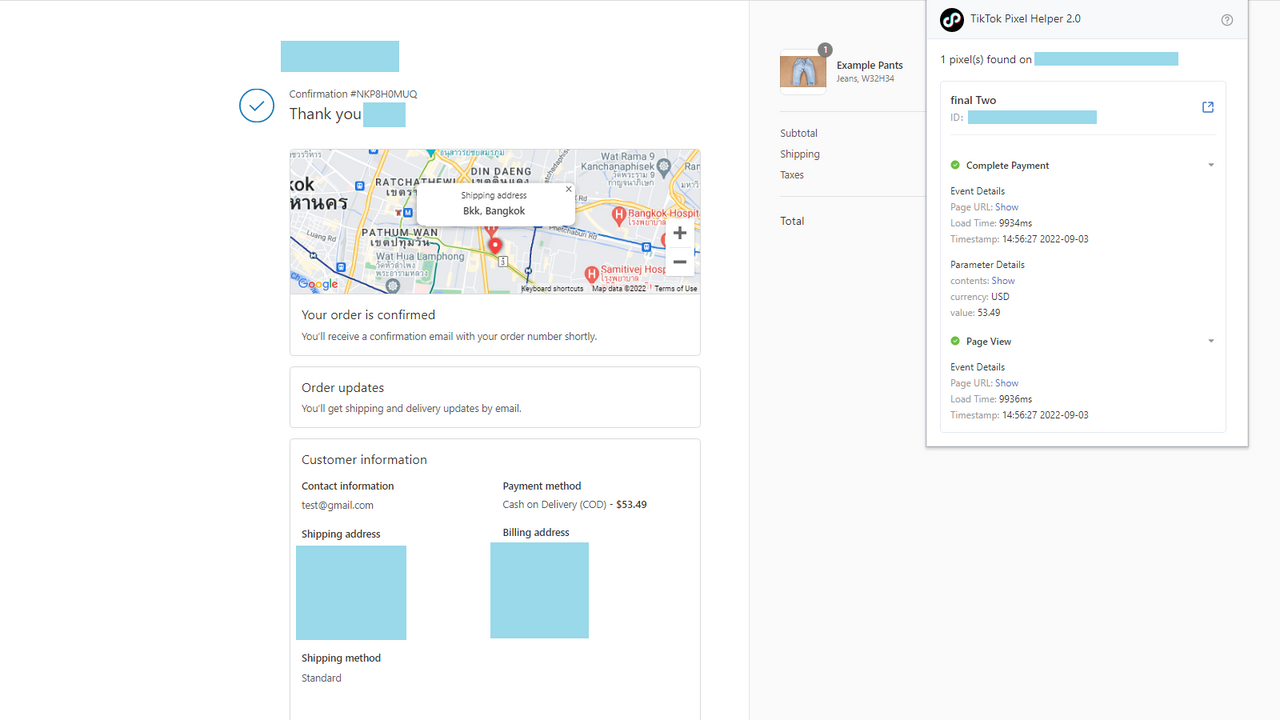
Step 3: Verify the Pixel
Use the TikTok Pixel Helper, a Chrome extension, to check for errors and ensure the Pixel is working correctly.
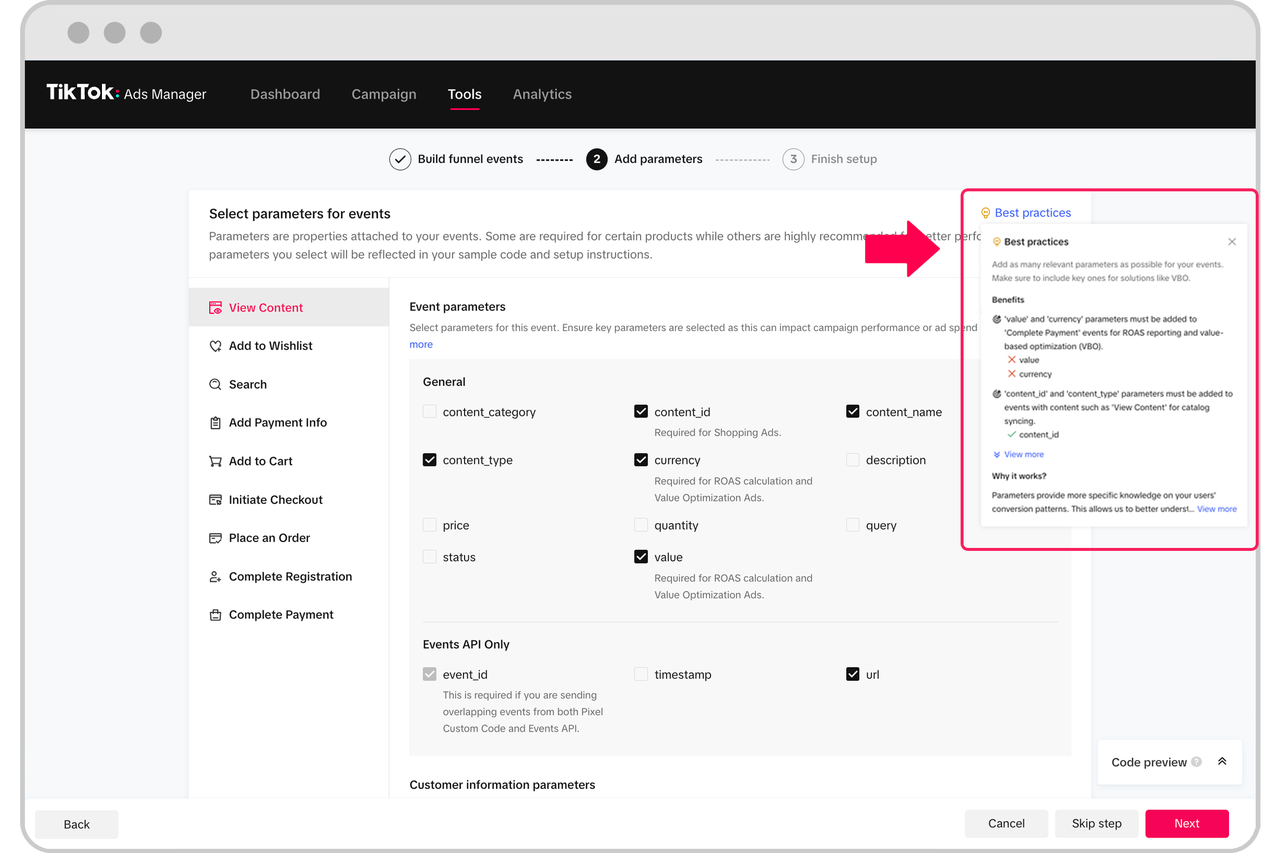
Step 4: Configure Events
Use the Event Builder to set up specific events you want to track, such as form submissions or product views.
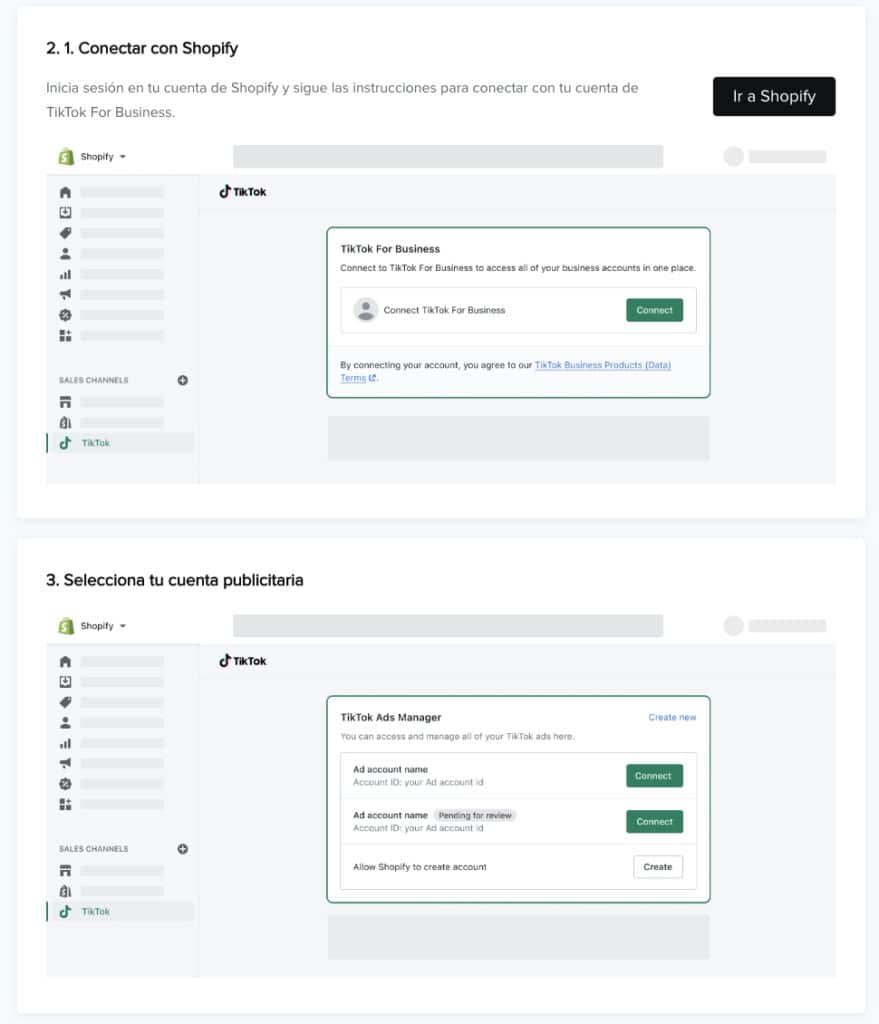
How to Add TikTok Pixel to Shopify
If you’re using Shopify, there are two methods to install the Pixel:
Method 1: Partner Integration
- Go to the Shopify App Store and install the TikTok app.
- Connect your TikTok Business and Ads accounts.
- The Pixel will be automatically installed and configured.
Method 2: Manual Installation
- Copy the Pixel code from the TikTok Ads Manager.
- Access your Shopify admin panel and go to Online Store → Themes → Edit Code.
- Paste the code between the
<head>and</head>tags. - For order tracking, add the code to the Additional Scripts section under Settings → Checkout.
How to Add TikTok Pixel to WordPress
For WordPress users, manual installation is the easiest method:
- Download and activate a plugin like WPCode.
- Go to Code Snippets → Header & Footer.
- Paste the TikTok Pixel code into the header section and save your changes.
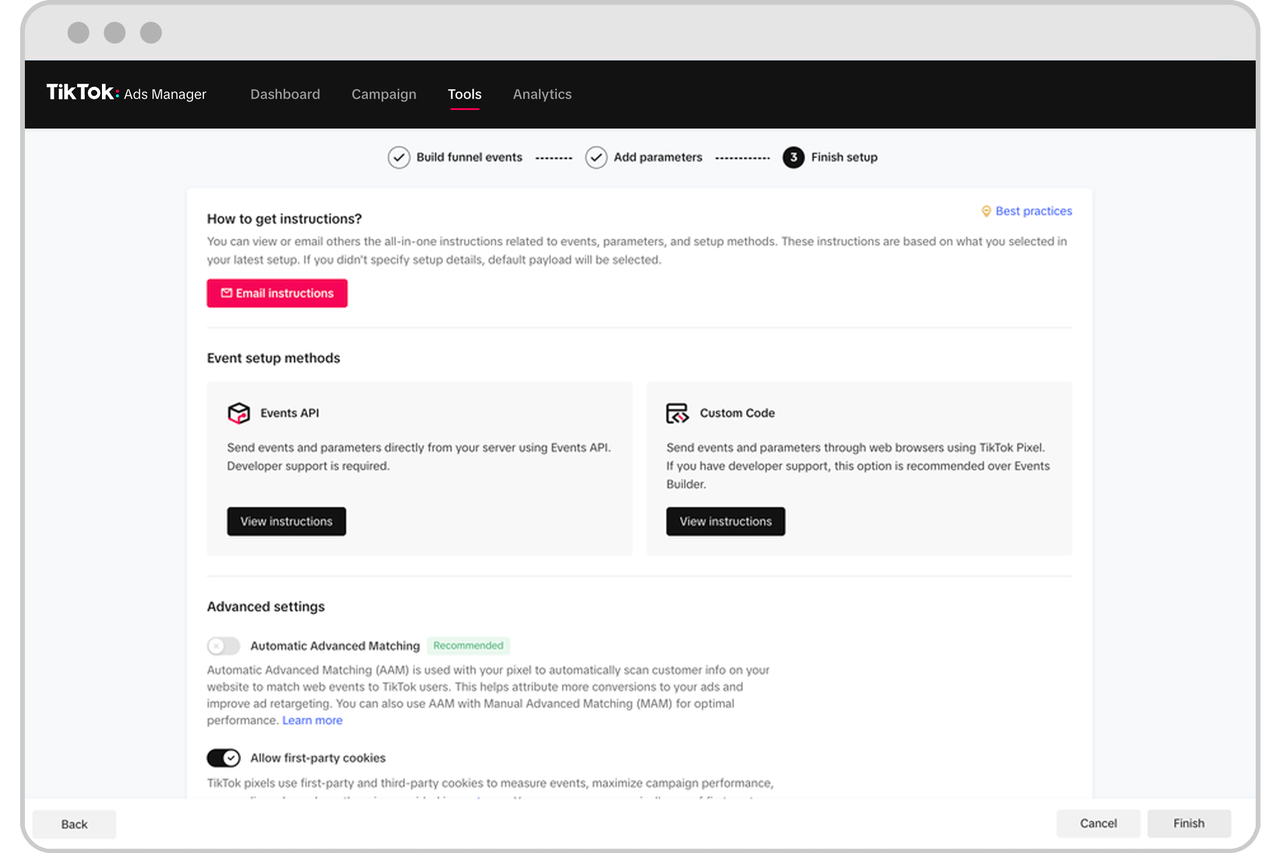
Verifying Your TikTok Pixel

After installation, it's crucial to verify that the Pixel is working correctly. Use the following methods:
- TikTok Pixel Helper: A Chrome extension that checks for errors and confirms the Pixel is active.
- Event Manager: Check for events under Ads Manager → Events.
- Diagnostics Tab: Review any errors in the Diagnostics section of your Event Manager dashboard.
Deleting a TikTok Pixel
If you need to remove a Pixel:
- Log in to TikTok Ads Manager.
- Go to Tools → Events.
- Select Data Sources and click the three dots next to the Pixel name.
- Choose Delete and confirm the action.
Conclusion
Setting up a TikTok Ads Pixel is a vital step in optimizing your advertising strategy. By tracking user interactions and leveraging the data collected, you can create more effective campaigns, build better audiences, and ultimately drive more conversions. Whether you're using Shopify, WordPress, or another platform, the process is straightforward and well worth the effort.
With the right setup, you'll be able to unlock the full potential of TikTok as a marketing tool and take your business to the next level.
Posting Komentar untuk "How to Set Up TikTok Ads Pixel: A Complete Step-by-Step Guide"
Posting Komentar