
How to Set Up TikTok Ads Pixel Events for Maximum Conversion
In today's digital marketing landscape, TikTok has emerged as a powerful platform for brands looking to reach a younger, highly engaged audience. With its unique blend of entertainment and commerce, TikTok offers an excellent opportunity for businesses to drive conversions through targeted advertising. One crucial element in maximizing the effectiveness of these ads is setting up TikTok Ads Pixel Events correctly. This guide will walk you through the process of setting up TikTok Ads Pixel Events for maximum conversion.
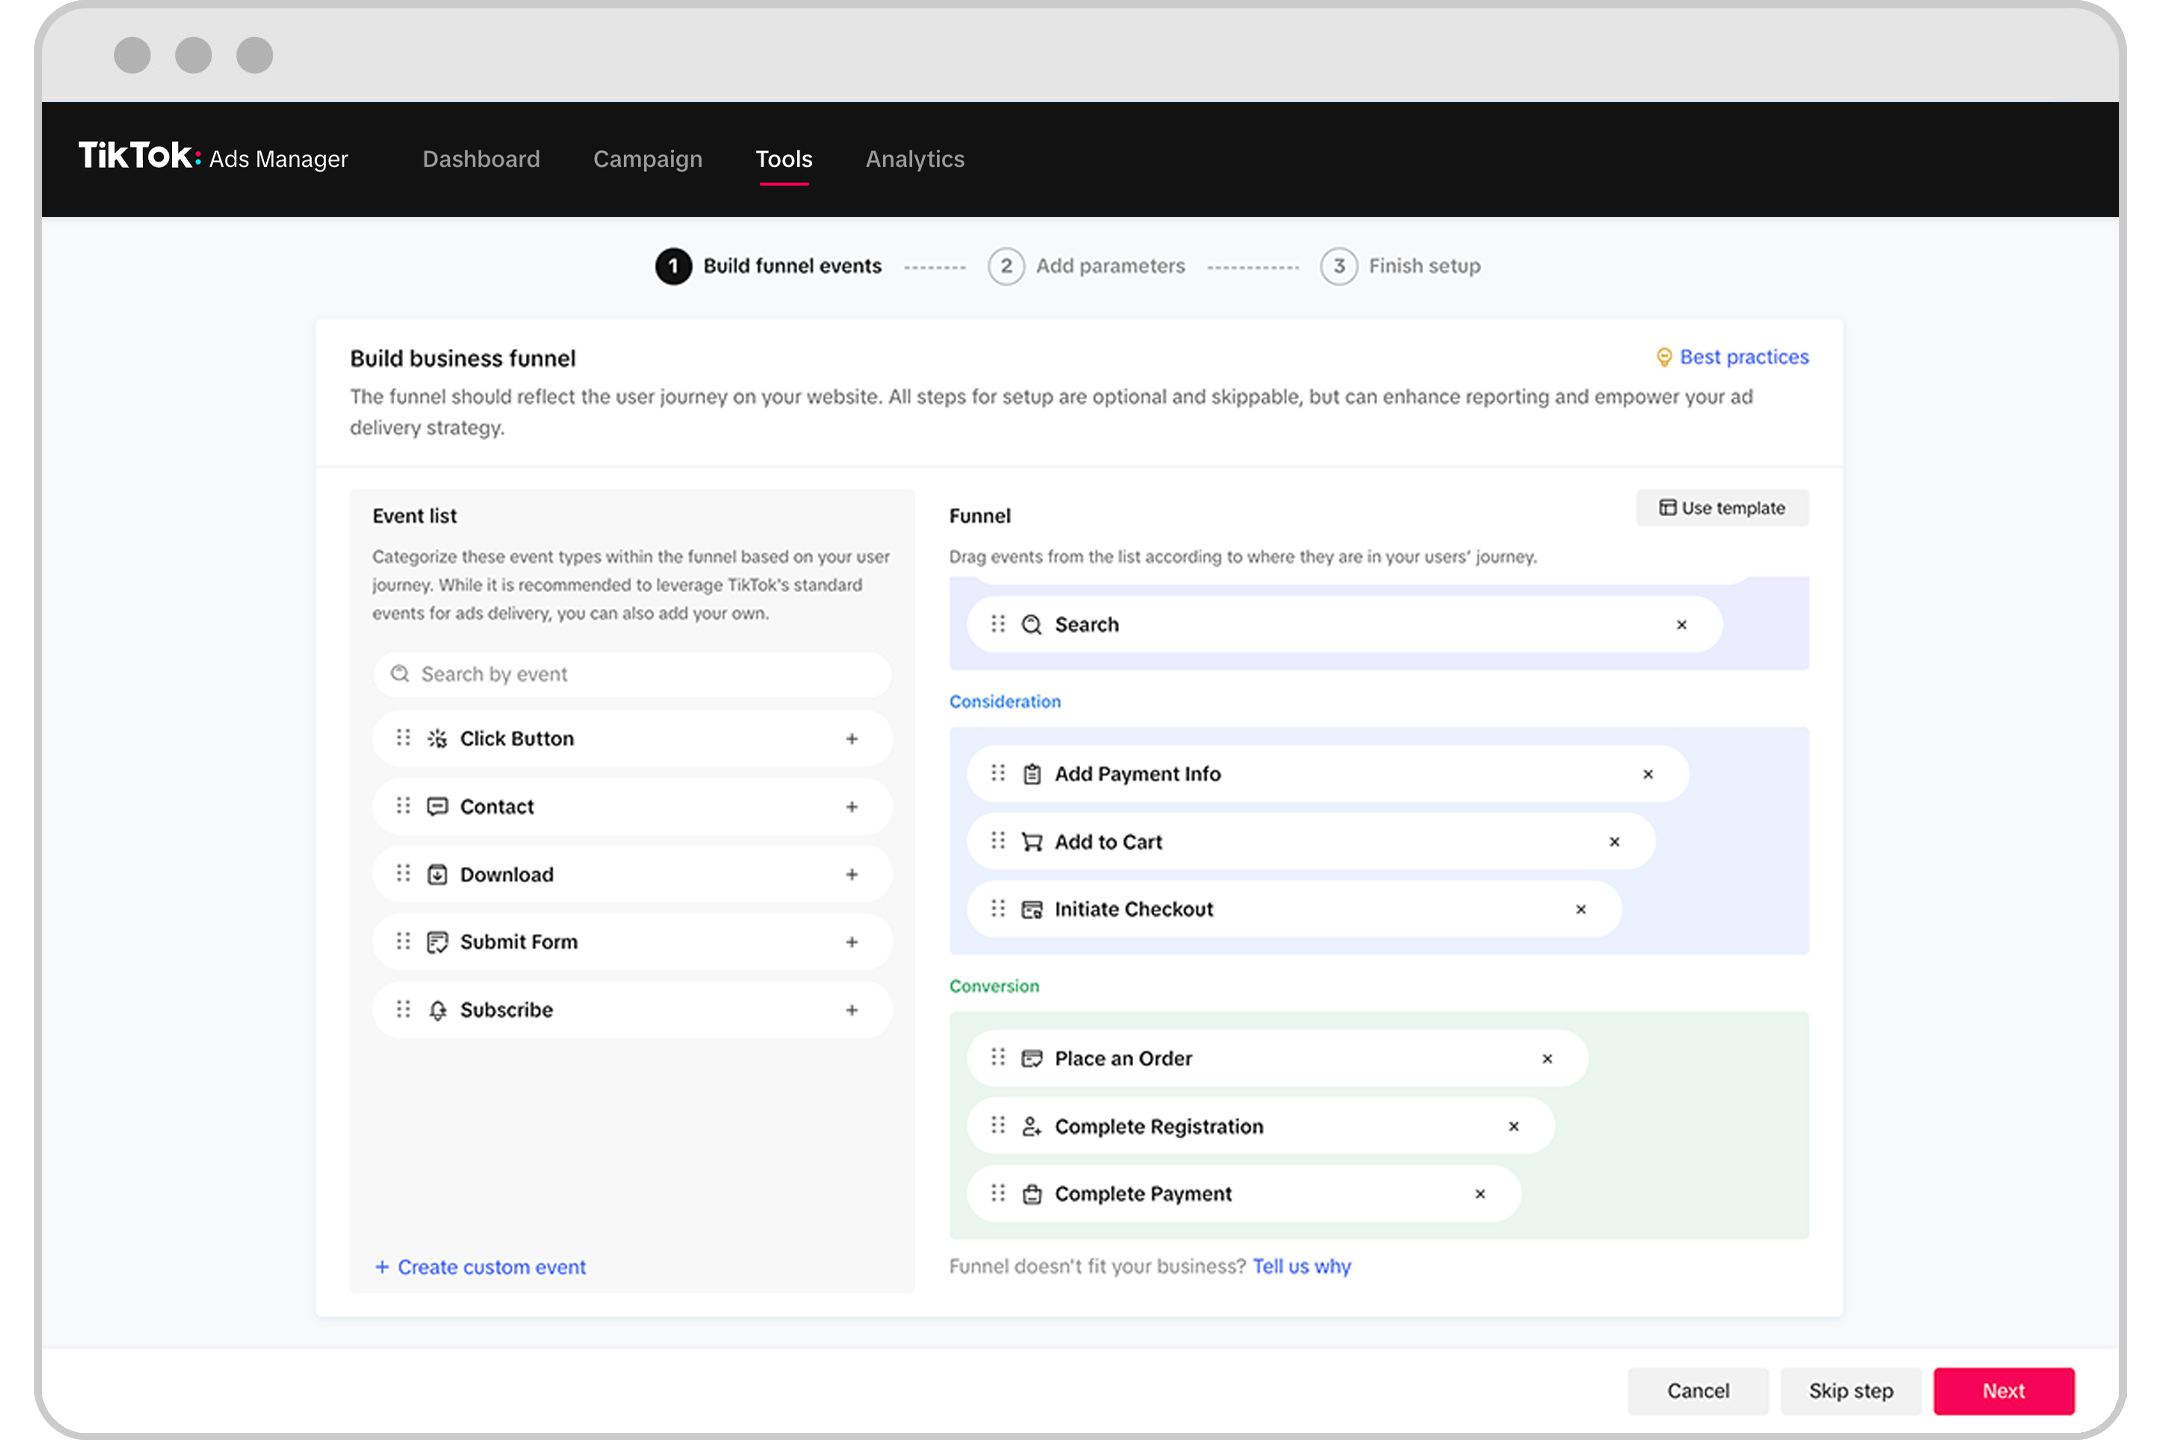
Understanding TikTok Pixel Events
TikTok Pixel is a tracking tool that allows advertisers to measure the effectiveness of their campaigns by tracking user interactions on their website or app. By setting up pixel events, you can gather valuable data about user behavior, such as page views, button clicks, form submissions, and more. This data helps you understand which ads are driving conversions and where improvements can be made.
Some of the standard events supported by TikTok Pixel include:
- ViewContent: Tracks when a user views a specific page.
- ClickButton: Tracks clicks on buttons throughout your site.
- AddToCart: Tracks when a user adds an item to their cart.
- CompleteRegistration: Tracks when a user completes a registration form.
- PlaceAnOrder: Tracks when a user makes a purchase.
These events provide insights into the customer journey, allowing you to optimize your ad campaigns for better performance.
Installing the TikTok Pixel
Setting up the TikTok Pixel involves a few key steps:
- Log in to Your TikTok Ads Manager: Go to ads.tiktok.com and log in with your account credentials.
- Navigate to Web Events: In the left-hand menu, click on "Assets" and then select "Events." From there, choose "Web Events."
- Set Up Your Pixel: Click on "Manage" and then "Set Up Web Events." Enter your website’s name as the Pixel Name and select "TikTok Pixel" from the options provided.
- Choose Manual Installation: Select "Manually Install Pixel Code" and proceed to the next step.
- Copy the Pixel Code: You will see a script snippet that needs to be added to your website. Copy this code and install it on your site using a tag management system like Google Tag Manager or directly in your codebase.
Once installed, ensure that the "Allow first-party cookie" option is enabled, and activate both "Phone Number" and "Email" for advanced matching.
Verifying the Installation
After installing the pixel, it's essential to verify that it's working correctly. You can use the TikTok Pixel Helper browser extension to check if the pixel is loading properly on your website. This tool provides detailed information about advanced matching and the events being fired, helping you confirm that everything is set up correctly.
Tracking Standard Events
Once the pixel is installed, you can start tracking various events using the ttq.track method. For example:
ttq.track('CompleteRegistration');
This line of code tracks when a user completes a registration form. You can also add parameters to provide more context about the event, such as the content type or currency.
Advanced Matching
Advanced matching is a crucial feature that enhances the accuracy of your tracking. It allows you to send encrypted customer data to TikTok, helping to identify users across different devices and browsers. To enable advanced matching, you can use the ttq.identify() method to pass in a user's phone number and email address when they're collected.
For manual advanced matching with the Events API, you'll need to encrypt the values using SHA256 and include them in the context.user object of your event payload.
Server-Side Events API Tracking
In addition to client-side tracking, server-side events API tracking offers more reliable results by bypassing ad blockers and privacy protections. A typical JSON payload for the Events API looks like this:
{
  "pixel_code": "{PIXEL-ID}",
  "event_id": "{UUID}",
  "timestamp": 1670353390,
  "event": "CompleteRegistration",
  "context": {
    "page": {
      "url": "https://apply.website.com/signup-complete"
    },
    "user": {
      "email": "{SHA256-EMAIL}",
      "phone_number": "{SHA256-PHONE}",
      "external_id": "{SHA256-USER-ID}"
    },
    "client_user_agent": "Mozilla/5.0 (Linux; Android 13; Pixel 6) AppleWebKit/537.36 (KHTML, like Gecko) Chrome/108.0.0.0 Mobile Safari/537.36",
    "ip": "{IP-ADDRESS}"
  },
  "properties": {
    "description": "New customer signup successfully completed",
    "content_type": "product",
    "content_id": "/signup-complete",
    "content_category": "apply.website.com"
  }
}
By implementing both client-side and server-side tracking, you can ensure that your conversion events are accurately recorded, even for users with ad blockers or privacy settings enabled.
Conclusion
Setting up TikTok Ads Pixel Events is a critical step in optimizing your advertising strategy. By following the steps outlined above, you can effectively track user interactions, gain valuable insights, and improve the performance of your TikTok ads. Whether you're a small business owner or a digital marketer, leveraging TikTok Pixel Events can help you achieve maximum conversions and drive growth in today's competitive market.
[IMAGE: TikTok Ads Pixel Events Setup for Maximum Conversion]
Posting Komentar untuk "How to Set Up TikTok Ads Pixel Events for Maximum Conversion"
Posting Komentar