
TikTok Pixel Event Configuration Guide: Complete Step-by-Step Tutorial
Setting up and configuring the TikTok Pixel is essential for any business looking to track user interactions, measure ad performance, and optimize their marketing strategies on the TikTok platform. Whether you're a beginner or an experienced marketer, understanding how to properly configure your TikTok Pixel can significantly enhance your ability to analyze customer behavior and improve campaign effectiveness.
This guide provides a comprehensive, step-by-step approach to setting up and managing TikTok Pixel events, ensuring that your data is accurate, reliable, and actionable.
Understanding the TikTok Pixel

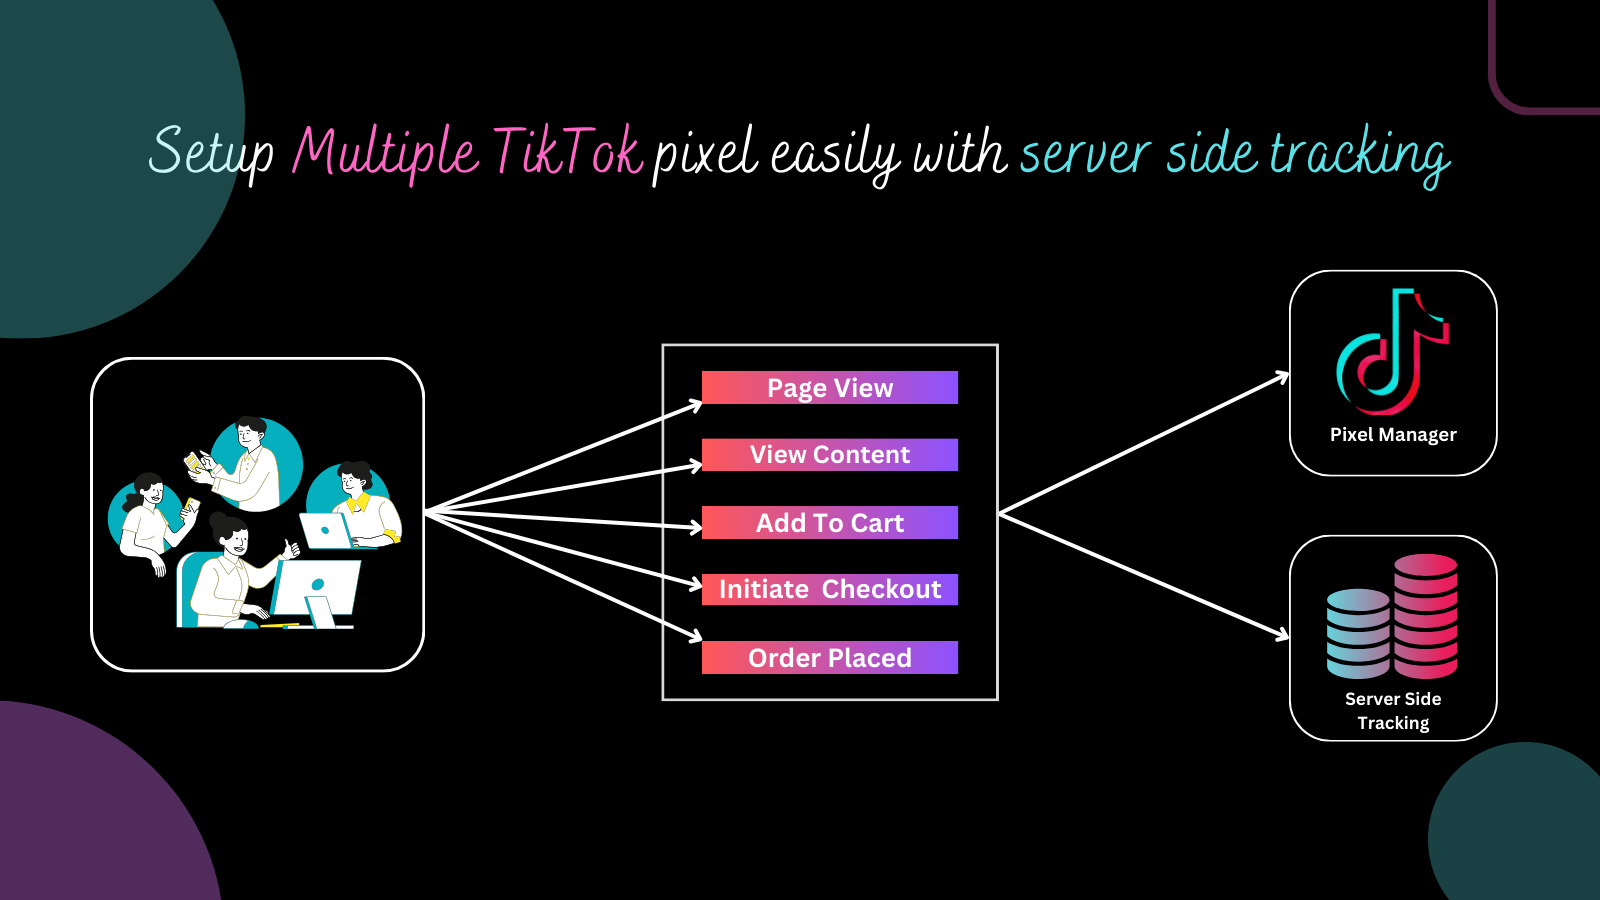
The TikTok Pixel is a tracking code that allows businesses to collect data from website visitors and share it with TikTok for ad measurement and optimization. It helps track key actions such as:
- View Content: When users view specific pages or products.
- Add to Cart: When users add items to their shopping cart.
- Purchase: When users complete a transaction.
- Custom Events: Any other user actions relevant to your business.
To get started, you need to install the TikTok Pixel on your website and set up the desired events using either the TikTok Pixel Helper or by manually integrating the code.
Step 1: Install the TikTok Pixel
Before you can track events, you need to install the TikTok Pixel on your website. Here’s how to do it:
Using the TikTok Ads Manager
- Log in to your TikTok Ads Manager account.
- Navigate to Tools > Events Manager.
- Click Connect Data Source and select Web.
- Enter your website URL and choose either Partner Integration (e.g., Shopify) or Manual Setup.
- If using a partner like Shopify, follow the setup instructions provided by the platform.
- If using manual setup, copy the Pixel Base Code and paste it into your website’s
theme.liquidfile before the closing</head>tag.
Step 2: Configure Event Tracking

Once the TikTok Pixel is installed, you need to define which events you want to track. This can be done through the TikTok Events Manager or by adding custom JavaScript to your site.
Common Events to Track
Here are some of the most commonly tracked events:
- View Content: Track when users visit product pages, homepages, or other important content.
- Add to Cart: Track when users add items to their shopping cart.
- Purchase: Track completed transactions.
- Custom Events: Define unique actions such as newsletter sign-ups, form submissions, or video views.
Example: Add to Cart Event Code
document.querySelectorAll('form[action="/cart/add"]').forEach(form => {
  form.addEventListener('submit', function() {
    ttq.track('AddToCart', {
      content_id: '{{ product.id }}',
      content_name: '{{ product.title }}',
      currency: '{{ shop.currency }}',
      value: {{ product.price | money_without_currency }}
    });
  });
});
Step 3: Verify Event Setup
After setting up your events, it's crucial to verify that they're working correctly. You can use the TikTok Pixel Helper Chrome Extension to check if events are firing as expected.
Steps to Use TikTok Pixel Helper
- Install the TikTok Pixel Helper extension in Chrome.
- Visit your website and perform the actions you want to track (e.g., add to cart, view content).
- Open the Pixel Helper extension and check if the events are being recorded.
- Ensure that the Pixel ID matches the one in your TikTok Ads Manager.
Step 4: Troubleshoot Common Issues
If events aren't showing up in your TikTok Ads Manager, consider the following troubleshooting steps:
- Check for Missing Parameters: Ensure that all required parameters (e.g.,
content_id,value) are included in your event tracking code. - Reinstall the TikTok App: If using Shopify, delete and reinstall the TikTok app to reset the pixel integration.
- Update Your Theme: Make sure your theme is up to date and that the TikTok Pixel script is not being blocked by cache or other plugins.
- Test with a Fresh Theme: If issues persist, test with a default Shopify theme to rule out theme-specific conflicts.
Step 5: Optimize and Analyze Your Data
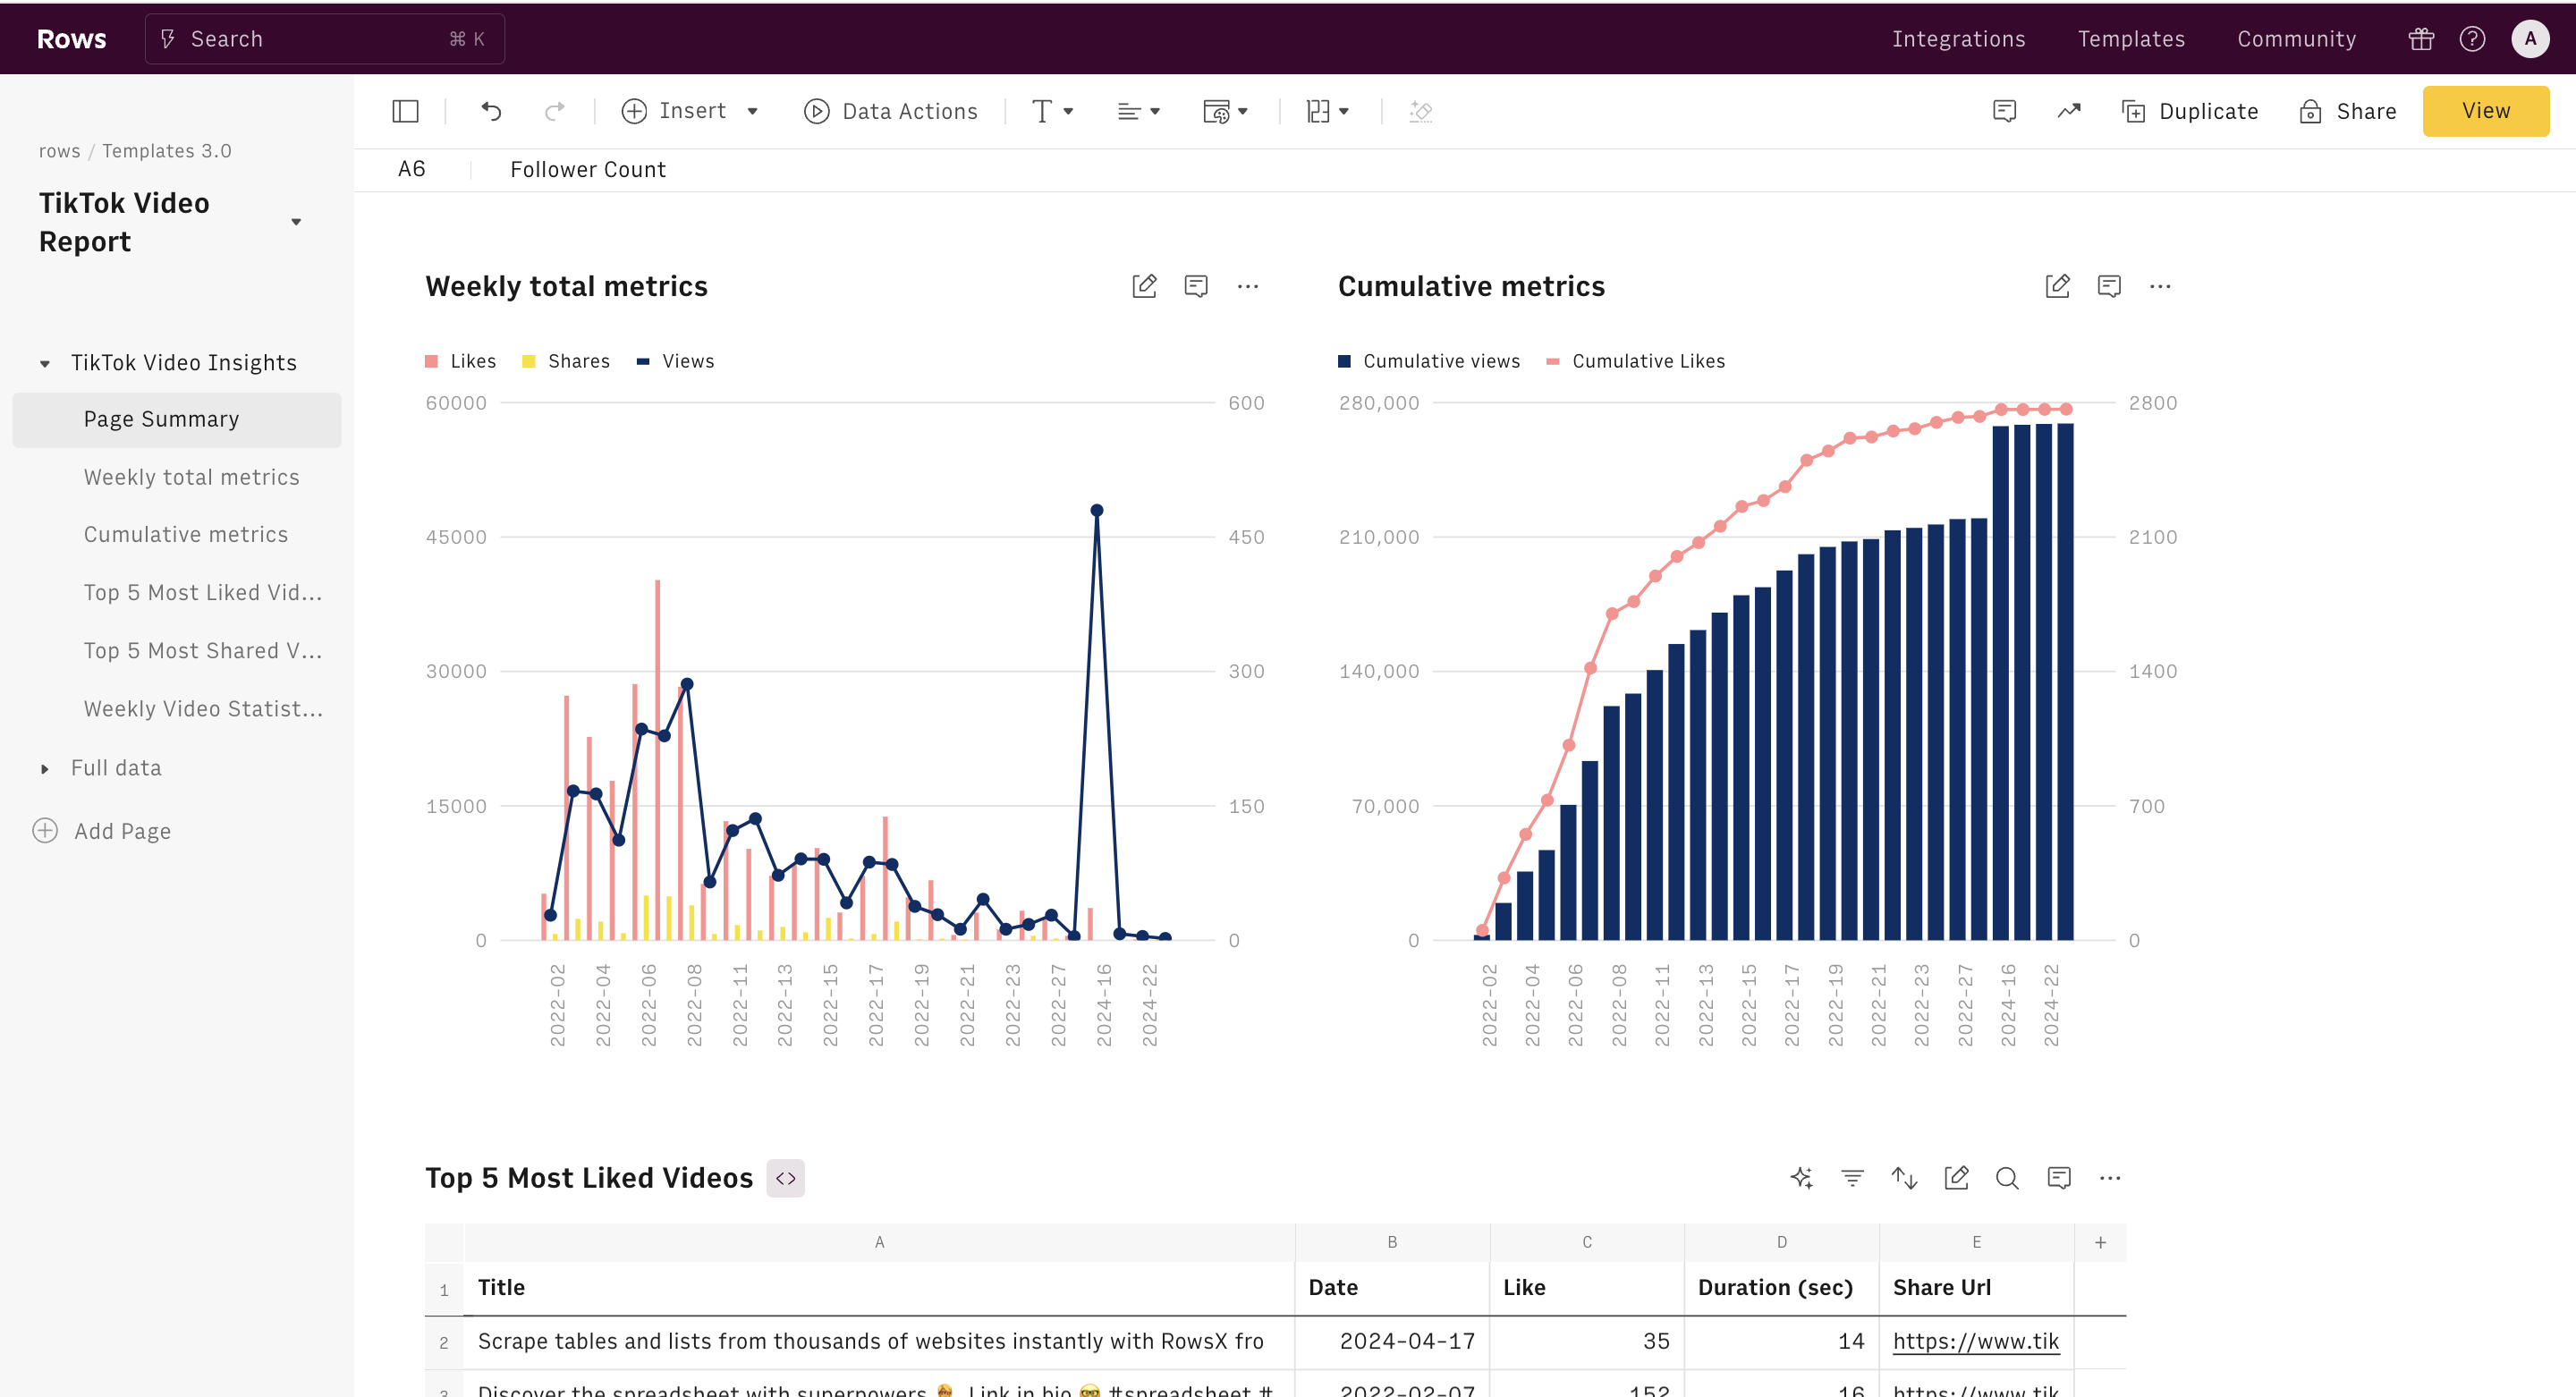
Once your TikTok Pixel is configured and verified, you can start analyzing the data to optimize your campaigns. Use the insights gained from the tracked events to:
- Improve ad targeting and creative messaging.
- Identify high-performing products or content.
- Adjust bidding strategies based on conversion rates.
- Refine your overall marketing strategy.
Conclusion
Configuring the TikTok Pixel is a critical step in maximizing the effectiveness of your TikTok advertising efforts. By following this step-by-step guide, you can ensure that your event tracking is accurate, reliable, and aligned with your business goals.
Whether you're using a third-party app like NS TikTok Pixel Event Tracking or manually setting up your events, the key is to monitor and optimize your data continuously. With the right configuration, you’ll gain valuable insights into customer behavior and make informed decisions to drive growth and ROI.
Start setting up your TikTok Pixel today and unlock the full potential of your TikTok marketing strategy.
Posting Komentar untuk "TikTok Pixel Event Configuration Guide: Complete Step-by-Step Tutorial"
Posting Komentar