
How to Set Up TikTok Pixel for Sales: A Complete Guide
In today's digital marketing landscape, leveraging social media platforms like TikTok can significantly boost sales and brand visibility. One of the most effective tools for this is the TikTok Pixel, a powerful tracking solution that allows businesses to monitor user interactions, track conversions, and optimize their ad campaigns. If you're running an e-commerce store, especially on WooCommerce or Shopify, setting up the TikTok Pixel is essential for maximizing your return on ad spend (ROAS) and improving customer targeting.
This guide will walk you through the process of setting up the TikTok Pixel for sales, ensuring you get the most out of your TikTok advertising efforts.
What is the TikTok Pixel?

The TikTok Pixel is a JavaScript code snippet that you place on your website to track user behavior and conversions. It helps you understand how users interact with your site after clicking on your TikTok ads. By monitoring events such as product views, add-to-cart actions, and purchases, the TikTok Pixel enables you to:
- Track sales and conversions accurately.
- Optimize ad targeting by identifying high-value users.
- Retarget potential customers who didn’t complete a purchase.
- Improve campaign performance using real-time data insights.
Why Integrate TikTok Pixel with WooCommerce or Shopify?
Integrating the TikTok Pixel with your e-commerce platform offers several advantages:
1. Enhanced Ad Targeting
By tracking user behavior, you can create custom audiences based on actions like page visits, product views, and completed purchases. This allows for more precise ad targeting, increasing the likelihood of conversions.
2. Optimize Ad Spend
With detailed conversion data, you can focus your budget on high-performing campaigns while reducing waste on underperforming ones. This leads to a better return on ad spend (ROAS).
3. Accurate Conversion Tracking
The TikTok Pixel captures every action users take on your site, giving you a clear picture of which ads are driving sales and which aren't.
4. Retargeting Capabilities
You can re-engage users who visited your site but didn’t make a purchase, increasing the chances of converting them later.
5. Valuable User Insights
Understanding how users interact with your site helps improve the customer experience and identify areas for optimization.
Step-by-Step Guide to Setting Up TikTok Pixel for Sales
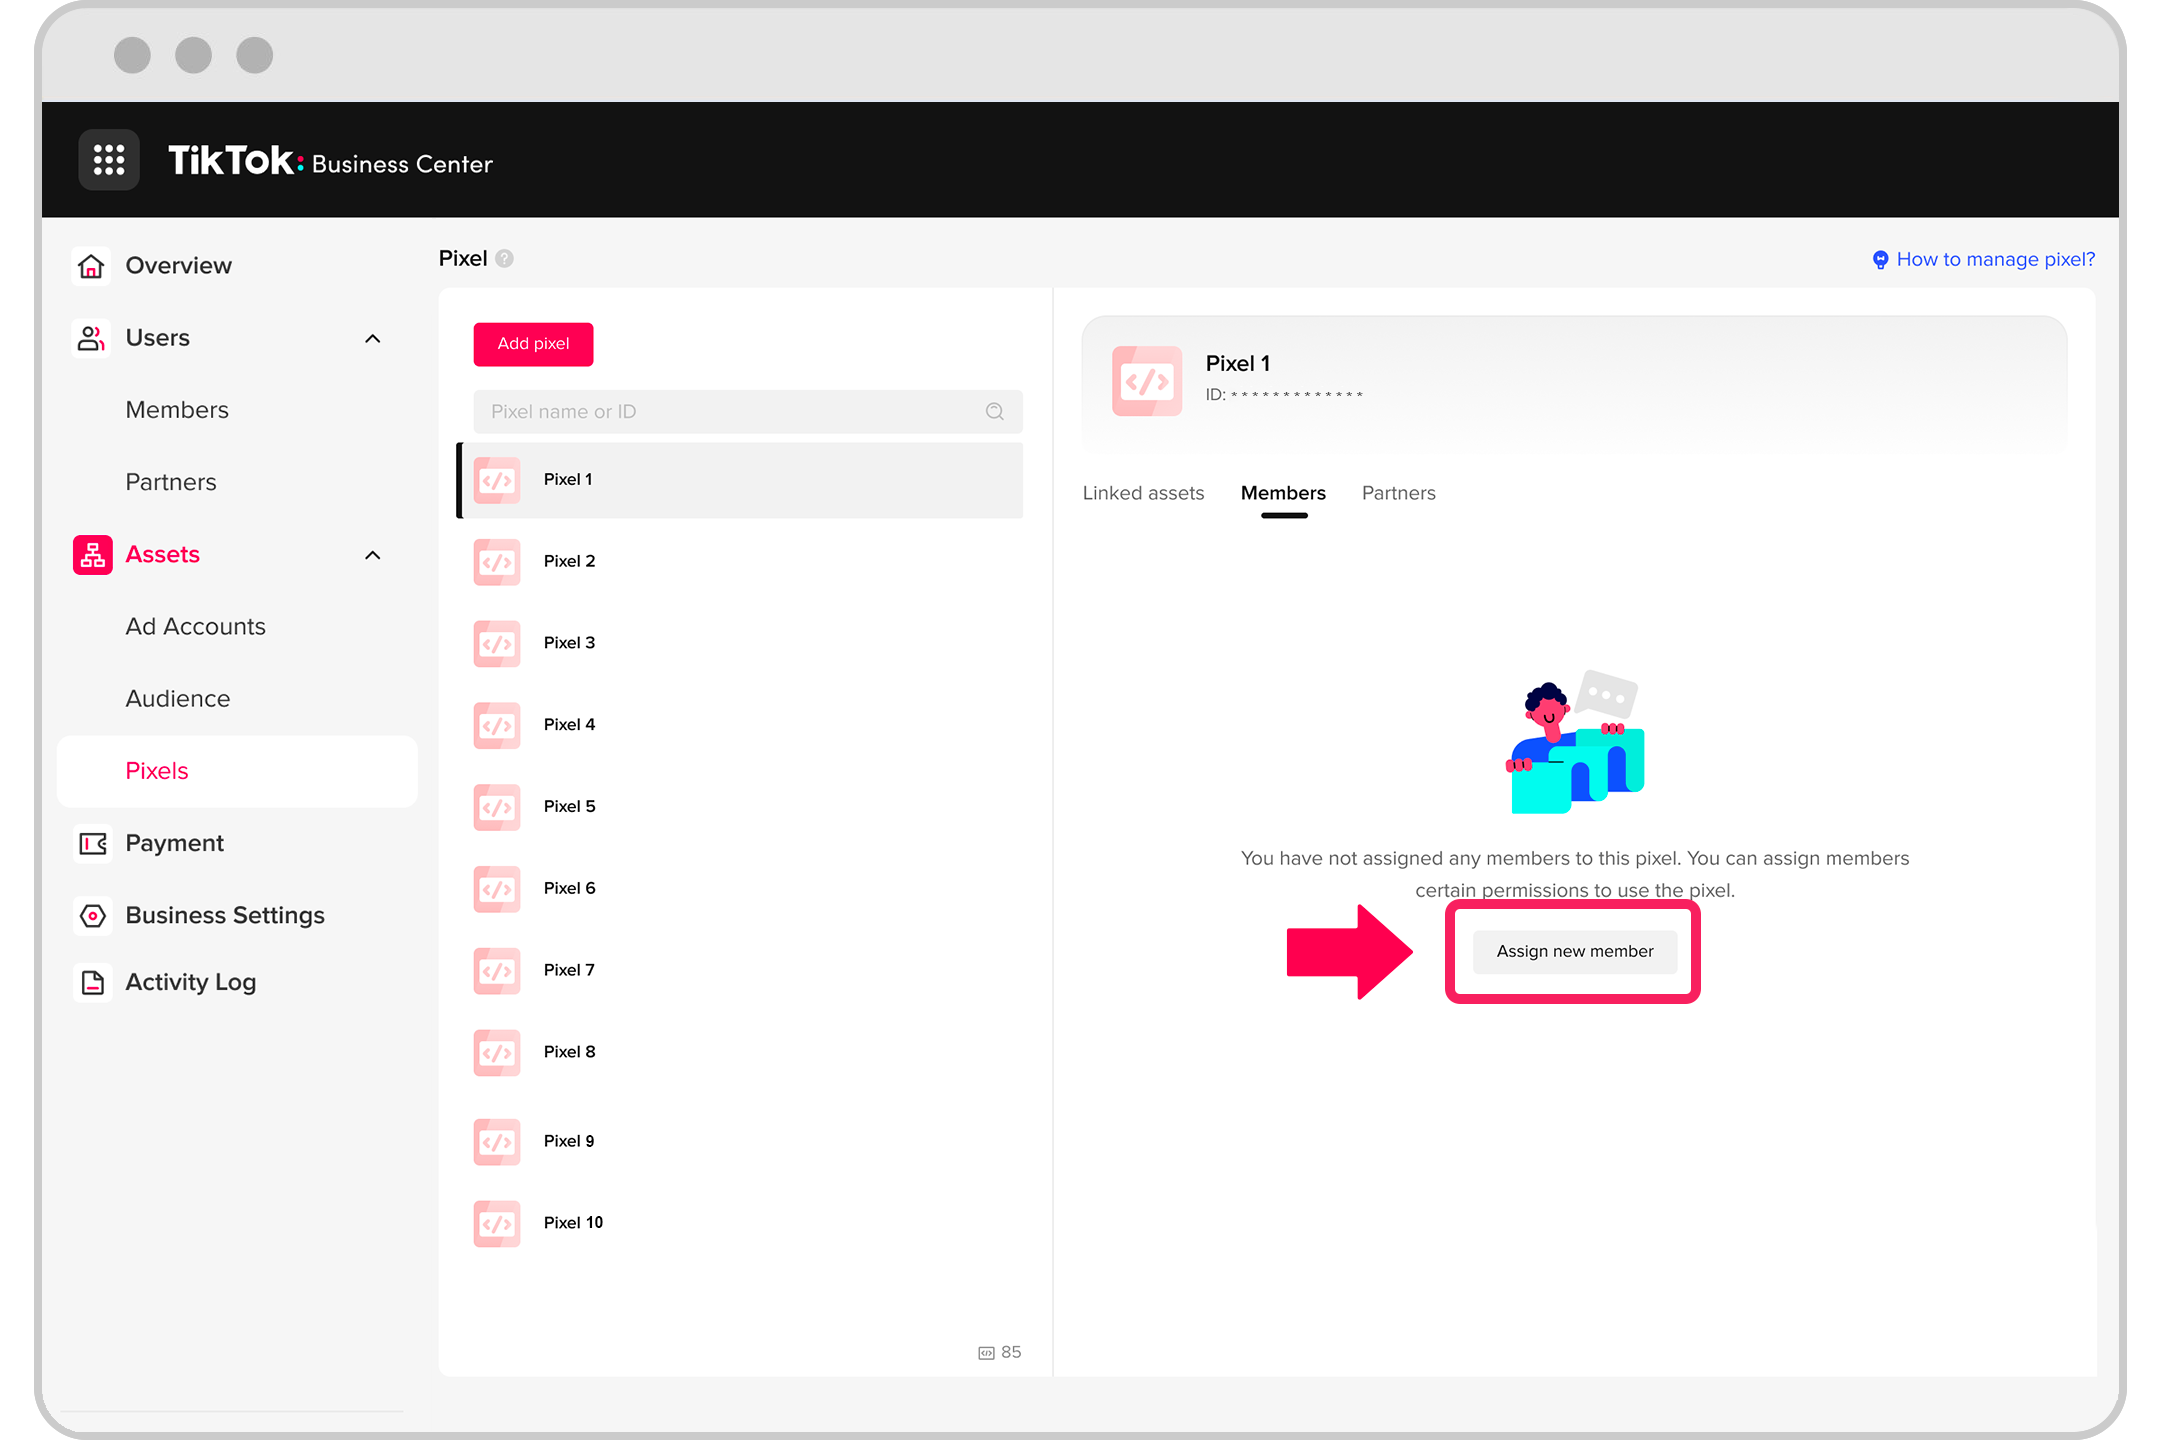
Step 1: Create a TikTok Pixel in Your Business Account
- Log in to your TikTok Business Manager account.
- Go to Tools > Events.
- Click Get Started to begin creating your pixel.
- Enter a name for your pixel and select Web as the connection method.
- Enter your website URL and choose the type of installation. For WooCommerce or Shopify, we recommend Manual Setup.
- Select TikTok Pixel + Events API and click Next.
- Name your pixel and click Create.
Step 2: Install the TikTok Pixel Code

Once your pixel is created, you’ll be provided with a Pixel ID. This is the unique identifier used to track events on your site.
For WooCommerce: - Use the FunnelKit Funnel Builder plugin to automatically handle the pixel integration. - Go to Settings > TikTok in the FunnelKit dashboard and paste your Pixel ID.
For Shopify: - Install the TikTok App from the Shopify App Store. - Follow the setup instructions to connect your TikTok business account and enter your Pixel ID.
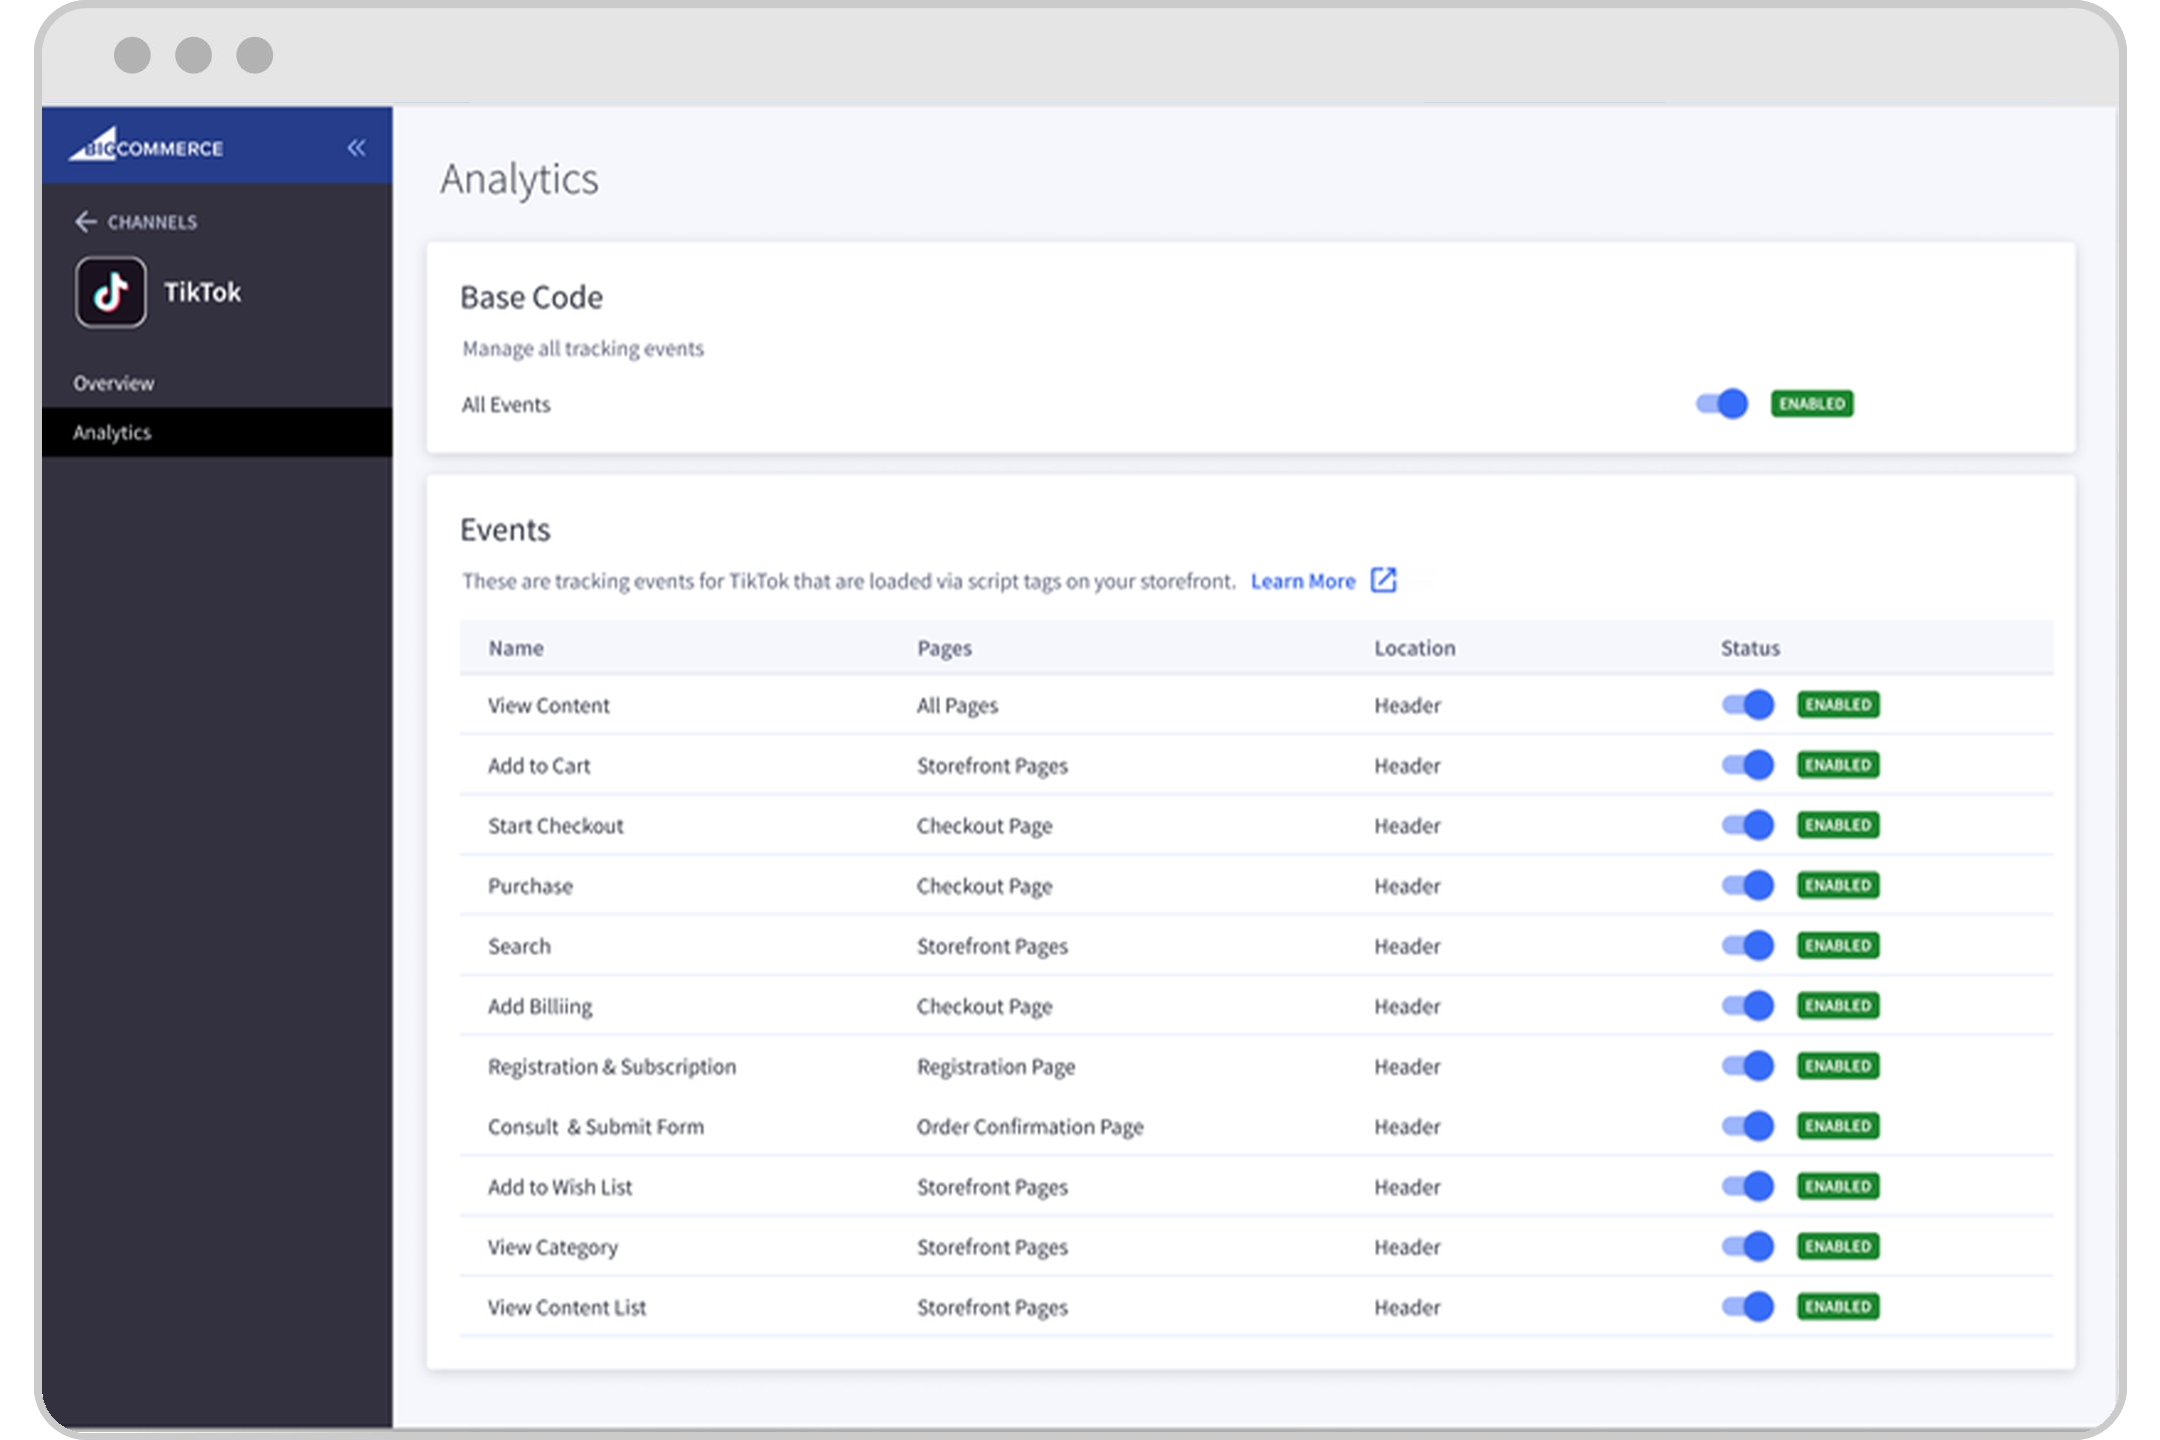
Step 3: Enable Event Tracking

After installing the pixel, you need to enable the events you want to track. Common events include:
- Page View
- Add to Cart
- View Content
- Initiate Checkout
- Purchase
Use the TikTok Event Builder to set up these events. For WooCommerce, the FunnelKit Funnel Builder handles event tracking automatically.
Step 4: Test the Pixel Installation
To ensure everything is working correctly, use the TikTok Pixel Helper Chrome extension:
- Install the TikTok Pixel Helper from the Chrome Web Store.
- Visit your website and perform actions like adding a product to the cart or completing a purchase.
- Open the Pixel Helper extension to see if the events are firing correctly.
If all events are showing up, your TikTok Pixel is properly installed.
Tips for Optimizing TikTok Pixel for Sales
Here are some best practices to get the most out of your TikTok Pixel:
- Enable Advanced Matching: This allows TikTok to match user data more effectively, improving ad targeting.
- Use UTM Parameters: Track traffic sources and analyze how TikTok drives visitors to your site.
- Set Up Retargeting Audiences: Create custom audiences based on user behavior to retarget them with personalized ads.
- A/B Test Creatives: Experiment with different ad formats and content to find what resonates best with your audience.
Frequently Asked Questions (FAQs)
Q: Can I add TikTok Pixel to my WordPress or Shopify site?
A: Yes, you can easily add the TikTok Pixel to both WordPress and Shopify using plugins like FunnelKit or the TikTok App.
Q: How do I verify that the TikTok Pixel is working?
A: Use the TikTok Pixel Helper extension to test if events are firing correctly on your site.
Q: What events should I track for sales?
A: Focus on key events like Add to Cart, Checkout Initiation, and Purchase to measure conversion effectiveness.
Final Thoughts
Setting up the TikTok Pixel for sales is a crucial step in optimizing your ad campaigns and driving more revenue. Whether you're using WooCommerce or Shopify, the process is straightforward, especially with tools like FunnelKit Funnel Builder that simplify the integration.
By tracking user behavior and leveraging the insights provided by the TikTok Pixel, you can refine your strategies, improve ad performance, and ultimately boost your sales. Start integrating the TikTok Pixel today and take your e-commerce business to the next level.
Posting Komentar untuk "How to Set Up TikTok Pixel for Sales: A Complete Guide"
Posting Komentar