
How to Set Up TikTok Pixel Tracking for Effective Marketing
In today’s digital marketing landscape, understanding user behavior and measuring the effectiveness of your ad campaigns is crucial. One powerful tool that can help you achieve this is the TikTok Pixel. This tracking tool allows you to monitor user interactions with your website after they’ve engaged with your TikTok ads. By leveraging the data collected through the TikTok Pixel, you can optimize your ad performance, build custom audiences, and ultimately drive more conversions.
If you're looking to enhance your marketing strategy and gain deeper insights into your audience, setting up TikTok Pixel tracking is a must. In this article, we’ll walk you through the process of installing and configuring the TikTok Pixel on your website.
What is TikTok Pixel?
The TikTok Pixel is a small piece of code that you place on your website. It tracks user actions such as clicks, form submissions, and purchases, allowing you to measure the impact of your TikTok ads. The data gathered by the Pixel helps you understand which ads are driving conversions and how users are interacting with your site.
This tool is particularly useful for businesses that run TikTok ads and want to track their return on investment (ROI). With the TikTok Pixel, you can:
- Track conversions
- Build custom audiences
- Optimize ad campaigns
- Retarget users who have visited your site but haven’t converted
[IMAGE: TikTok Pixel tracking setup for effective marketing]
Benefits of Using TikTok Pixel
There are several advantages to using the TikTok Pixel in your marketing strategy:
1. Conversion Tracking
By tracking user actions on your website, you can determine which TikTok ads are leading to actual sales or sign-ups. This data helps you allocate your ad budget more effectively.
2. Audience Building
The Pixel allows you to create custom audiences based on user behavior. For example, you can target people who have visited specific pages or added items to their cart but didn't complete a purchase.
3. Ad Optimization
With detailed analytics from the Pixel, you can refine your ad targeting and messaging to improve performance. You can also use lookalike audiences to reach new customers similar to your existing ones.
4. Retargeting
The TikTok Pixel makes it easy to set up retargeting campaigns. You can show ads to users who have previously interacted with your brand but haven’t converted yet.
[IMAGE: TikTok Pixel tracking setup for effective marketing]
Step-by-Step Guide to Setting Up TikTok Pixel
Setting up the TikTok Pixel involves a few simple steps. Below is a detailed guide to help you install and configure the Pixel on your website.
Step 1: Create Your TikTok Pixel
- Log in to your TikTok Ads Manager account.
- Navigate to the Assets tab and select Event.
- Choose Website Pixel and click Manage to access the Events Manager.
- Click Create Pixel and name your pixel. Choose the Manually install pixel code installation type.
- Select the mode for setting your event rules (we recommend Standard Mode) and click Next.
- Copy the base code of your pixel and save it for later use.
[IMAGE: TikTok Pixel tracking setup for effective marketing]
Step 2: Install the TikTok Pixel on Your Website
Once you have the Pixel code, you need to install it on your website. Here's how to do it on different platforms:
For WordPress Users
- Go to your WordPress dashboard.
- Navigate to Plugins > Add New and search for a plugin like WPCode.
- Install and activate the plugin.
- Go to Code Snippets > Header & Footer and paste the Pixel code into the Header section.
- Save your changes.
For Shopify Users
- Log in to your Shopify admin panel.
- Go to Online Store > Themes > Edit Code.
- Find the
</head>tag and paste the Pixel code directly above it. - Save your changes.
For Other Platforms
If you’re using a platform like Wix, Webflow, or a custom CMS:
1. Locate the <head> section of your website.
2. Paste the Pixel code just before the closing </head> tag.
3. Save and publish your changes.
[IMAGE: TikTok Pixel tracking setup for effective marketing]
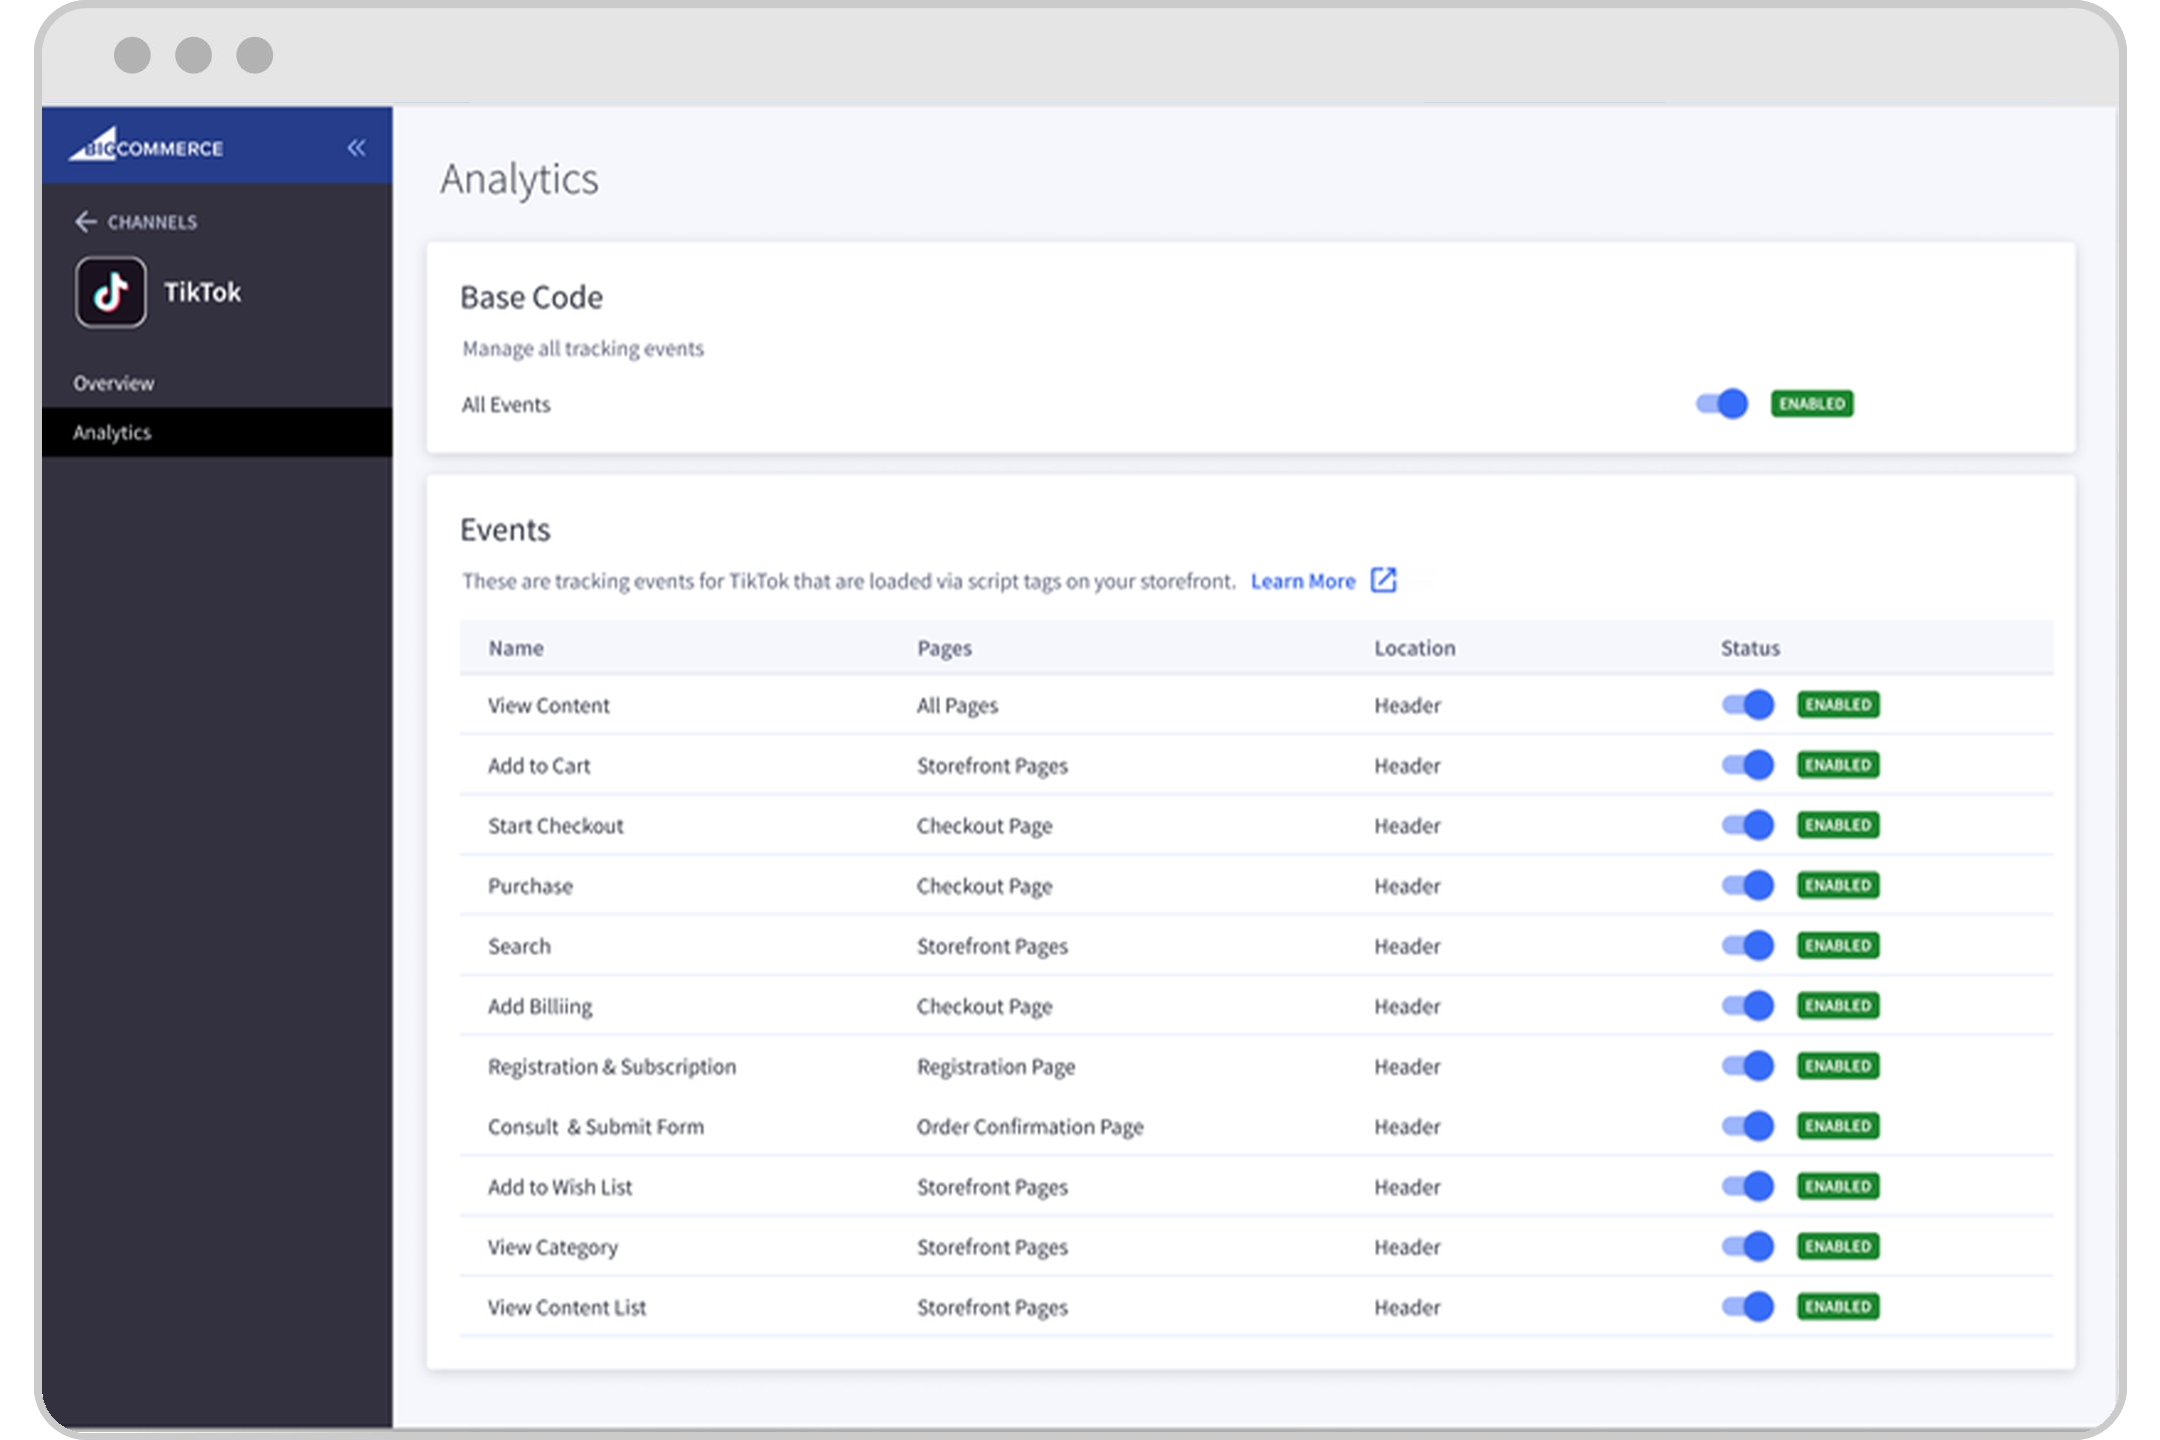
Step 3: Configure Events
After installing the Pixel, you need to define the events you want to track. These could include:
- Page views
- Form submissions
- Add to cart
- Checkout completion
- Purchases
To set up events: 1. Return to the Events Manager in TikTok Ads Manager. 2. Choose the type of events you want to track. 3. Define the rules for each event (e.g., track a form submission when a user reaches a thank-you page). 4. Click Complete Setup to save your changes.
[IMAGE: TikTok Pixel tracking setup for effective marketing]
Step 4: Verify the Installation
Once everything is set up, it’s important to verify that the TikTok Pixel is working correctly. You can use the TikTok Pixel Helper, a Chrome extension, to check for errors and ensure the Pixel is firing properly.
Additionally, you can test the Pixel by visiting your website and checking the Event Manager in TikTok Ads Manager to see if the events are being recorded.
[IMAGE: TikTok Pixel tracking setup for effective marketing]
Conclusion
Setting up the TikTok Pixel is a straightforward process that can significantly enhance your marketing efforts. By tracking user behavior and optimizing your ad campaigns, you can improve conversion rates and increase ROI. Whether you're running TikTok ads for e-commerce, lead generation, or brand awareness, the Pixel provides valuable insights that can help you make data-driven decisions.
With the right setup and configuration, the TikTok Pixel becomes an essential part of your digital marketing toolkit. Start tracking your ad performance today and take your marketing strategy to the next level.
Posting Komentar untuk "How to Set Up TikTok Pixel Tracking for Effective Marketing"
Posting Komentar