
How to Implement and Set Up TikTok Pixel for Advanced Tracking
In today's digital landscape, businesses are constantly looking for ways to improve their online presence and track user behavior across multiple platforms. TikTok, with its massive user base and engaging content, has become a powerful advertising ecosystem. To measure conversions, optimize campaigns, and build effective remarketing funnels, it's essential to implement the TikTok Pixel correctly. This article will guide you through the process of setting up and implementing the TikTok Pixel for advanced tracking.
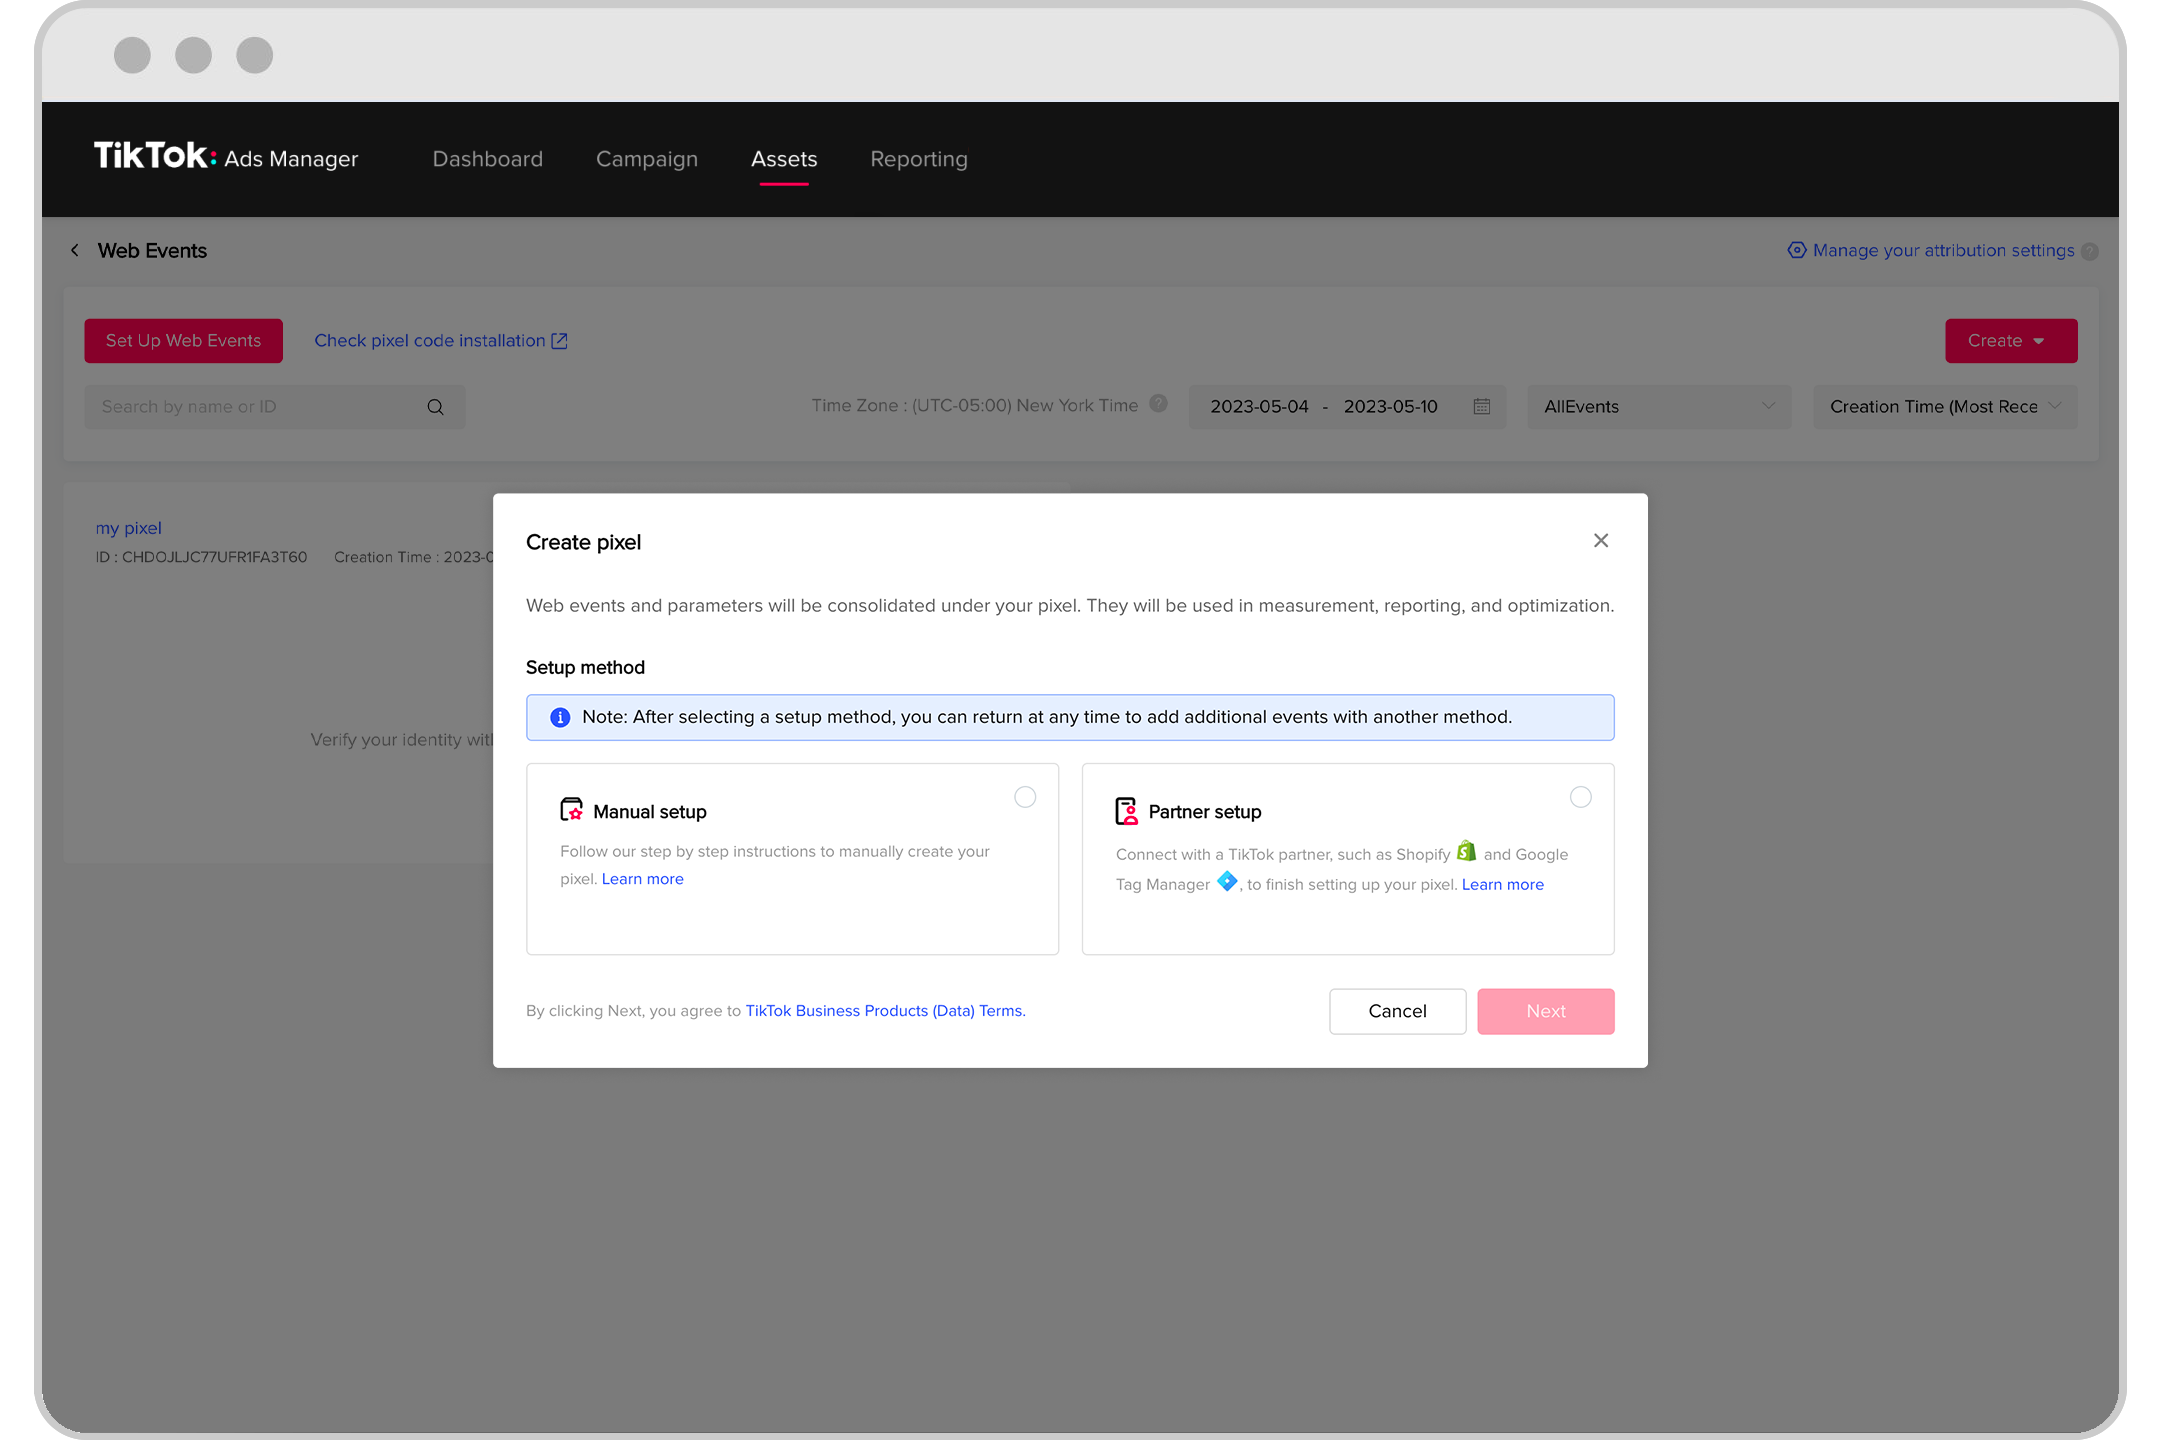
Step 1: Create a TikTok Pixel in the Ads Manager
Before you can start tracking user interactions on your website, you need to create a TikTok Pixel. Follow these steps:
- Log in to your TikTok Ads Manager.
- Navigate to the Assets section, then go to Events and select Web Events.
- Click on Create New Pixel and follow the prompts to set up your pixel.
- Once created, copy the Pixel ID provided. You'll need this later when installing the code on your website.
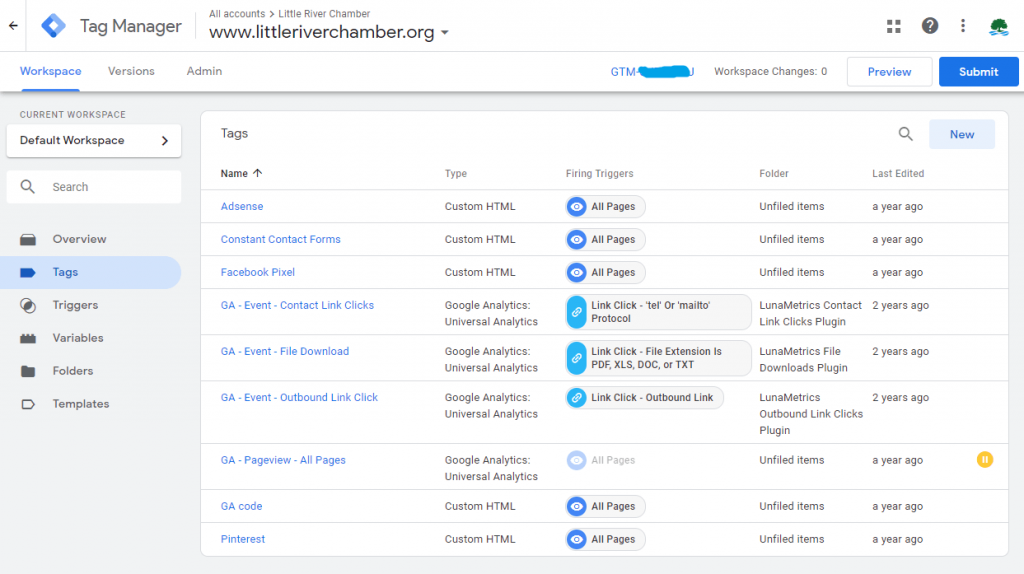
Step 2: Install the TikTok Base Code via Google Tag Manager (GTM)
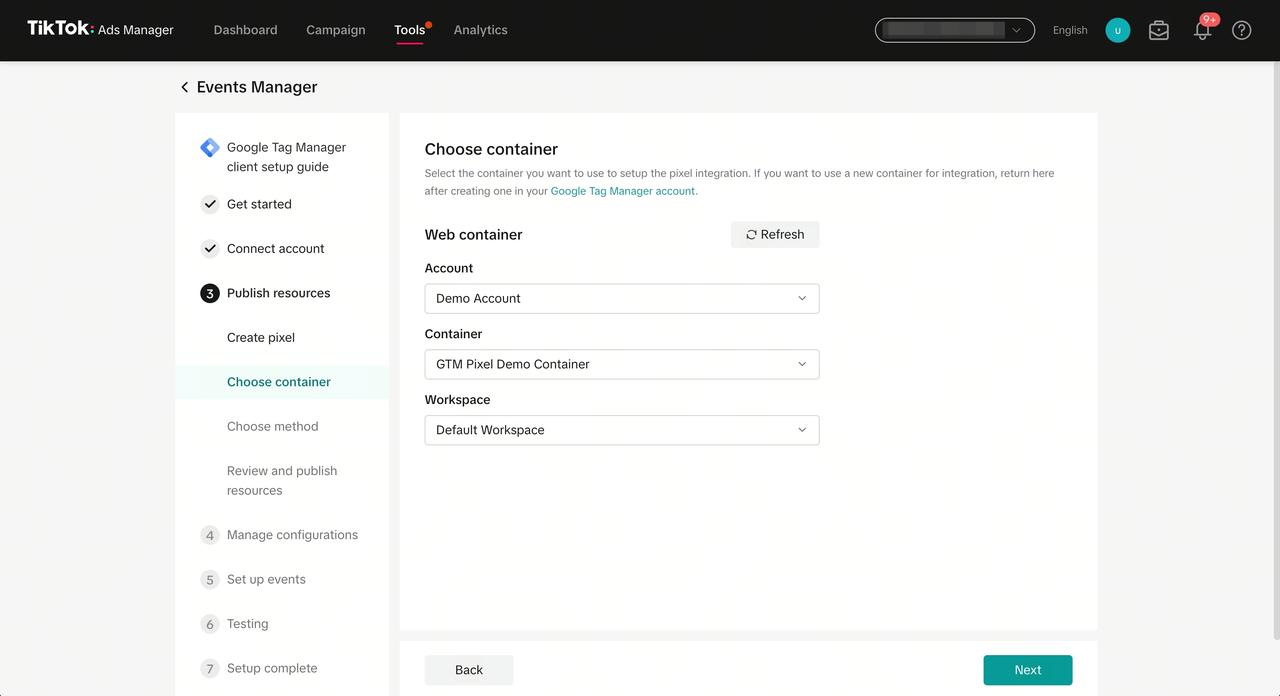
Google Tag Manager (GTM) is a powerful tool that allows you to manage and deploy tracking tags without modifying your website’s code directly. Here's how to install the TikTok Pixel using GTM:
- In Google Tag Manager, create a new Custom HTML Tag.
- Paste the following code into the tag:
```html
``
   Replace
YOUR_PIXEL_ID` with the actual Pixel ID you copied earlier.
- Set the trigger to All Pages so that the base code runs on every page of your website.
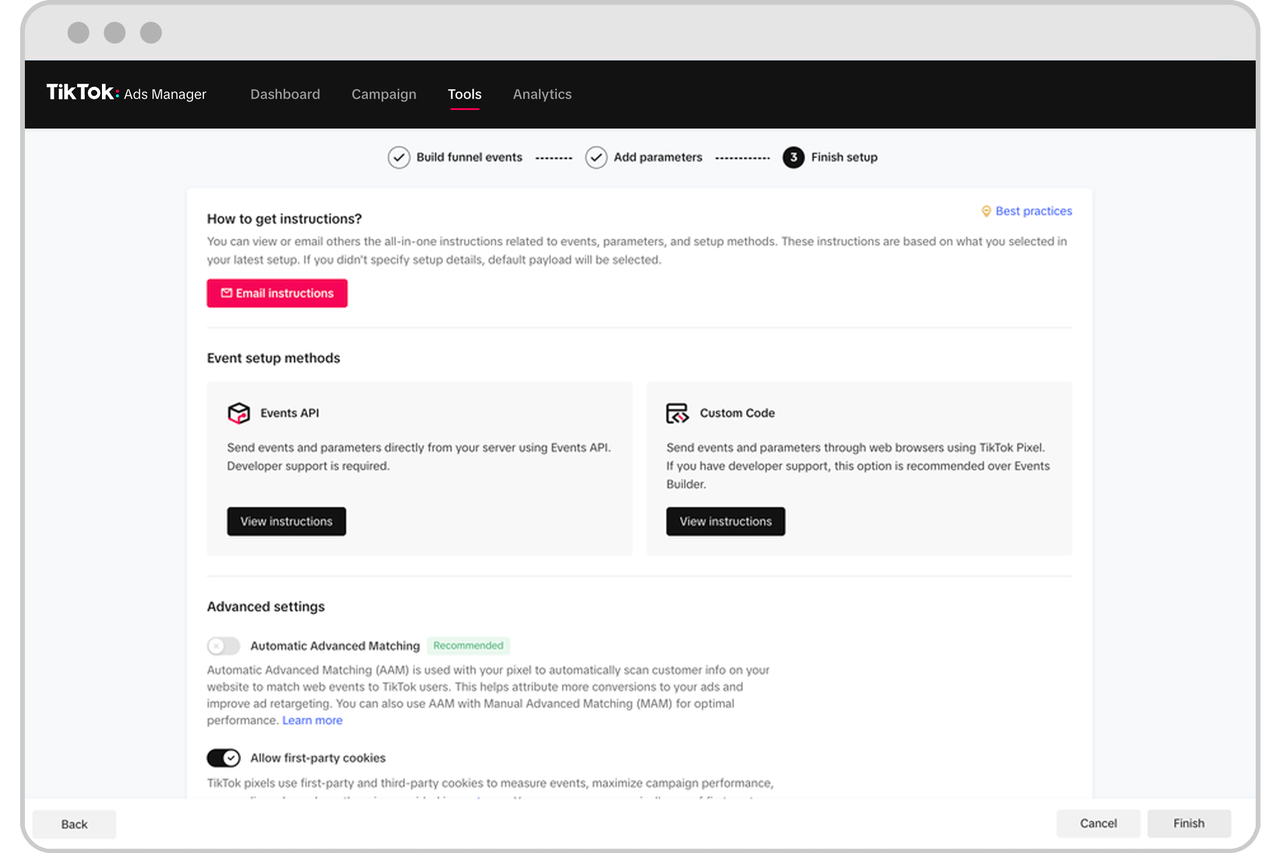
Step 3: Track Specific Events (e.g., Add to Cart)
Once the base code is installed, you can begin tracking specific user actions, such as adding an item to the cart or completing a purchase. Here's how to track an "Add to Cart" event:
- Create another Custom HTML Tag in GTM.
- Add the following code:
```html
``
Make sure to replace}and` with the appropriate data layer variables from your website.}
- Set the trigger to fire when the Add-to-Cart button is clicked or when a corresponding GTM event is triggered.
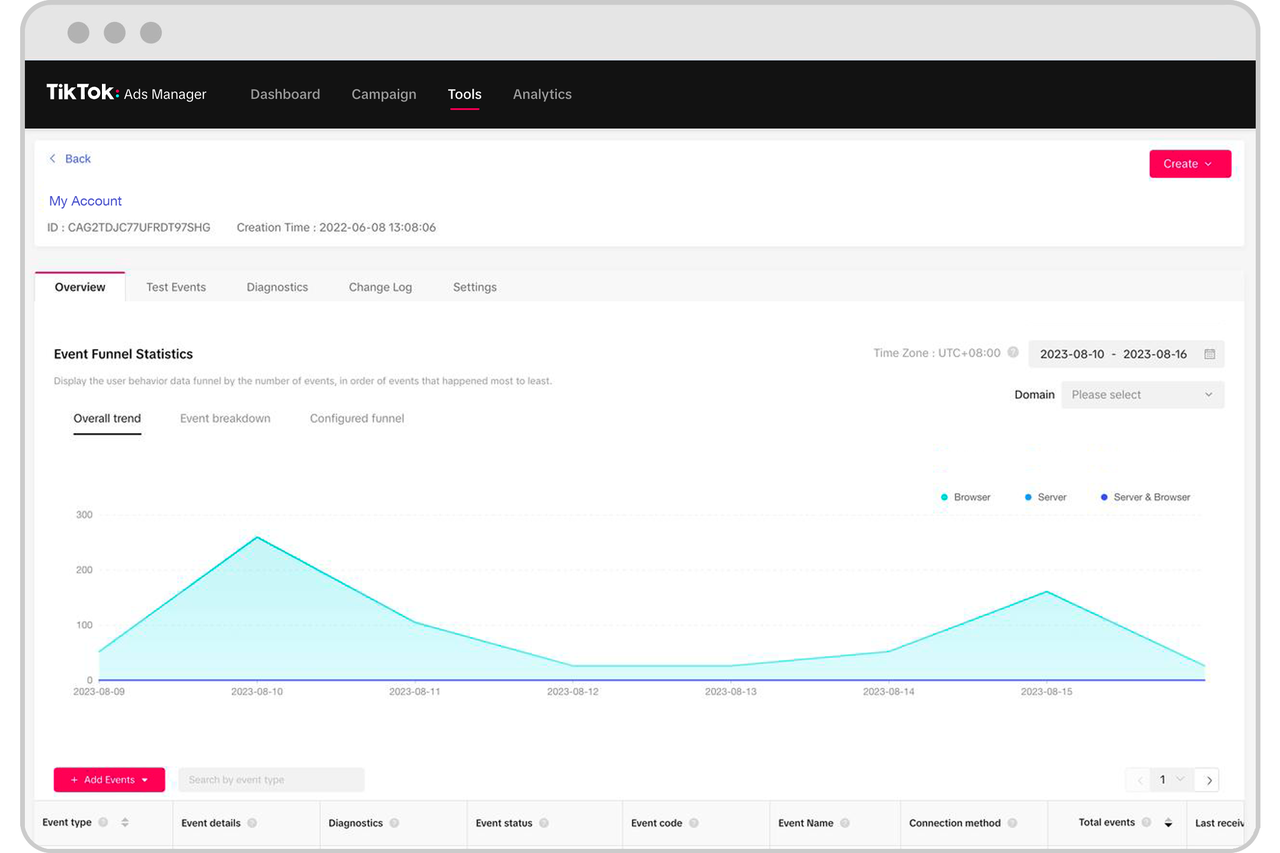
Step 4: Test and Validate Your Implementation
After setting up the TikTok Pixel, it's crucial to test and validate your implementation to ensure everything is working correctly. Here are some best practices:
- Use browser extensions like the TikTok Pixel Helper to check if events are being tracked properly.
- Utilize GTM Preview Mode to simulate how the pixel will behave on your live site.
- Always perform QA testing on a staging environment before pushing changes to production.
Best Practices for Managing Multiple Pixels
If you're also tracking other platforms like Snapchat or Twitter (X), it's important to maintain consistency and organization. Here are some tips:
- Keep all your pixels under a dedicated tag folder in GTM for easier maintenance.
- Use separate variables for product IDs, prices, and user data to avoid conflicts.
- Implement Consent Mode or triggers to align with privacy regulations like GDPR and CCPA.
Conclusion
Implementing the TikTok Pixel is a critical step for any business looking to track user behavior, optimize ad campaigns, and improve remarketing efforts. By following the steps outlined above, you can ensure accurate tracking and gain valuable insights into how users interact with your website. Whether you're running an e-commerce store or promoting services, the TikTok Pixel provides the tools you need to make data-driven decisions and grow your online presence.
Posting Komentar untuk "How to Implement and Set Up TikTok Pixel for Advanced Tracking"
Posting Komentar