
How to Install TikTok Pixel Events: A Step-by-Step Guide for Marketers

In today's digital marketing landscape, leveraging the power of social media platforms is essential for businesses aiming to reach and engage their target audience. Among these platforms, TikTok has emerged as a formidable force, with over 1.6 billion users globally. For marketers, integrating TikTok Pixel events into their advertising strategies can significantly enhance campaign performance, improve targeting, and boost conversion rates. This guide will walk you through the process of installing TikTok Pixel events, ensuring your marketing efforts are optimized for maximum impact.
What is a TikTok Pixel?
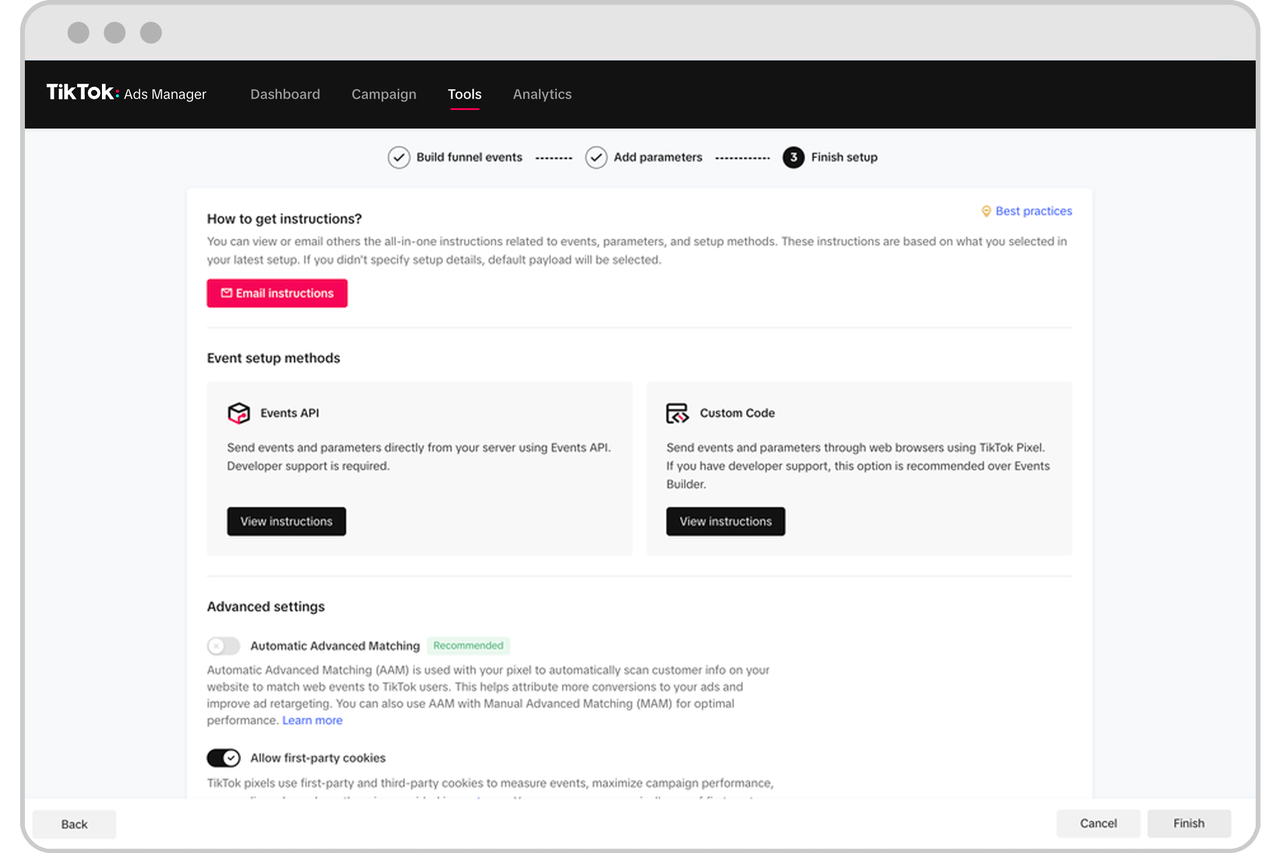
A TikTok Pixel is a tracking tool that allows you to monitor user actions on your website or app. It captures data such as page views, clicks, and conversions, which can then be used to refine your ad campaigns. By installing the TikTok Pixel, you gain valuable insights into how users interact with your content, enabling you to make data-driven decisions to improve your marketing strategy.
Key Benefits of Using TikTok Pixel
- Conversion Tracking: Track specific user actions, such as purchases or form submissions, to measure the effectiveness of your ads.
- Audience Building: Create custom audiences based on user behavior, allowing for more targeted and personalized advertising.
- Optimize Ad Performance: Use the data collected by the Pixel to fine-tune your ad campaigns and improve ROI.
- Retargeting: Reach users who have previously interacted with your website but didn't complete a desired action, increasing the chances of conversion.
How to Install TikTok Pixel Events

Step 1: Access TikTok Ads Manager
To begin, log in to your TikTok Ads Manager account. This platform serves as the central hub for managing your TikTok advertising campaigns. Navigate to the "Tools" section and select "Events." Here, you'll find options to set up and manage your TikTok Pixel.
Step 2: Choose Your Website
Once you're in the Events section, click on "Get Started." You'll be prompted to select the type of website you want to track. Choose "Web" if you're tracking engagement on a website. Enter your website URL and proceed to the next step.
Step 3: Select Installation Method
TikTok offers two methods for installing the Pixel: manual setup and partner integrations. If you're using a platform like Shopify, WooCommerce, or Google Tag Manager, you can opt for a partner integration, which simplifies the process. Otherwise, choose "Manual Setup" to copy and paste the Pixel code directly into your website's header.
Step 4: Name Your Pixel
Give your TikTok Pixel a name that reflects your campaign or marketing goal. This will help you identify and manage your Pixels effectively. Click "Create" to finalize the setup.
Adding TikTok Pixel to Your Website

After creating your Pixel, the next step is to install it on your website. The installation process varies depending on the platform you're using:
For WordPress Users
If you're using WordPress, you can utilize plugins like WPCode to easily add the TikTok Pixel. Go to the Plugins section, search for "WPCode," and activate it. From the dashboard, navigate to "Code Snippets" and paste the Pixel code into the Header section. Save your changes to ensure the Pixel is correctly installed.
For Shopify Users
Shopify users can take advantage of the platform's partnership with TikTok. Follow the steps outlined in the TikTok Ads Manager to connect your Shopify store. Once connected, the Pixel will automatically integrate with your store, allowing you to track user interactions seamlessly.
For Google Tag Manager Users
If you're using Google Tag Manager, you can create a new tag and select "Custom HTML" to paste the TikTok Pixel code. Configure the tag to fire on all pages, ensuring comprehensive tracking across your website.
Verifying Your TikTok Pixel Installation
After installing the TikTok Pixel, it's crucial to verify that it's functioning correctly. You can use the TikTok Pixel Helper, a Chrome extension, to test for errors and ensure the Pixel is tracking events accurately. Additionally, check the Event Manager in the TikTok Ads Manager for any diagnostics or issues that may need attention.
Best Practices for Using TikTok Pixel Events

To maximize the benefits of TikTok Pixel events, consider the following best practices:
- Enable Advanced Matching: Utilize advanced matching features to send encrypted customer data to TikTok, enhancing audience targeting and improving ad performance.
- Track Key Events: Focus on tracking critical events such as Add to Cart, Checkout, and Purchase to gain insights into user behavior and optimize your campaigns accordingly.
- Use UTM Parameters: Incorporate UTM parameters in your ad links to analyze traffic sources and measure the effectiveness of your campaigns.
- A/B Testing: Experiment with different ad creatives and offers to determine what resonates best with your audience, leading to higher engagement and conversions.
Conclusion
Installing TikTok Pixel events is a vital step for marketers looking to harness the power of TikTok for their advertising campaigns. By following the steps outlined in this guide, you can effectively track user interactions, optimize your ad strategies, and achieve better results. As the digital landscape continues to evolve, staying ahead of the curve with tools like TikTok Pixel will be essential for success in the competitive world of online marketing. Start implementing TikTok Pixel events today and watch your campaigns thrive!

Posting Komentar untuk "How to Install TikTok Pixel Events: A Step-by-Step Guide for Marketers"
Posting Komentar